About windows


Website:
windows has written 395 articles so far, you can find them below.


Alphabet Floral Letter “G”

The Gladiola flower is represented in the alphabet letter “G”. We believe that we made this suncatcher letter about 10 – 12 years ago. As Gladiolas’s come in many colors one can choose different flower and letter colors to suit the tastes and decor of whom they plan on giving one to or for their own home.

StainedGlassAlphabetLetterG

 Design by Rachel Cecere

Bevel Suncatcher Repair 2014

Tena one of our daughters obtained this beveled suncatcher many years ago and unfortunately it fell and needed repair. Upon taking it all apart there were 2 bevels broken.

StainedGlassBevelBrokenSuncatcher2014

We then rebuilt the suncatcher with the new bevels, fixed the bent wire, cleaned and polished. A good idea for someone building a new one, it is best to bead all of the bevel edges prior to assembly as it results in a much better looking finished piece. The picture below shows the completed and restored suncatcher,

StainedGlassBevelSuncatcherRepaired2014

Designer Unknown


Alberta Rose Transom Window Summer 2014

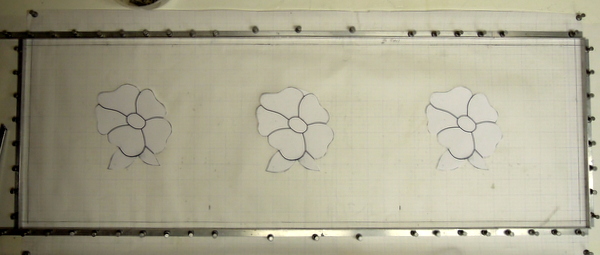
We were commissioned to make 3 interior transom windows for a farm home in Central Alberta. The following photos will take you from initial design ideas, construction, completion and installation of the first window which featured 3 Alberta Roses. These windows measure approximately 3 feet wide by 1 foot high.

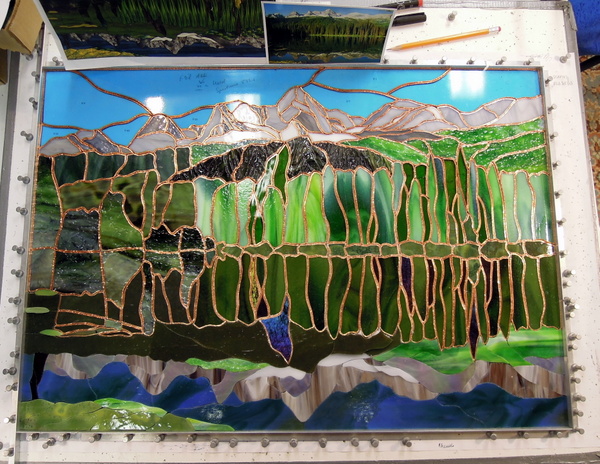
The first photo shows the beginning of our initial design idea.

StainedGlassAlbertaRoseTransomWindowDesignStart2014

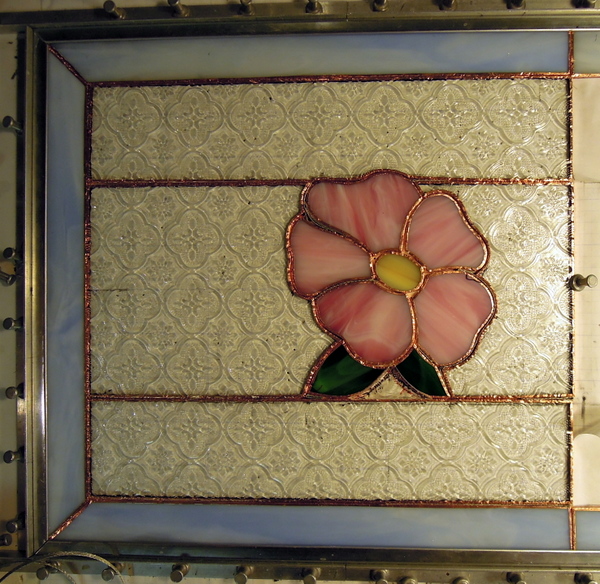
After client approval of the Alberta Roses, border design and interior glass we first started with the Alberta Roses and the border.

AlbertaRoseTransomWindowDesign2014

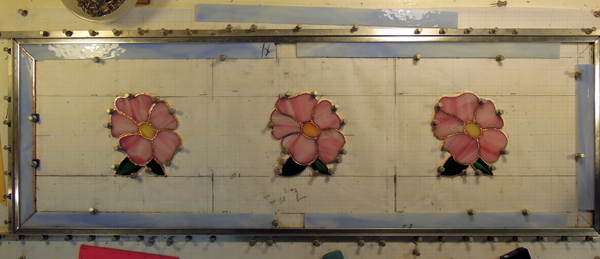
The following picture shows the left side, we used Spectrum’s Pearl Opal #603-81CC Blue Skies for the border, Spectrum’s 609.8 Clear White Pink Wispy for the Roses, with #6067-83CC Mimosa Pearl Opal for the rose centres and #329.6 Dark Green Swirled with White Wispy for the rose leaves. The surrounding glass was an architectural clear texture glass called Morisco, which poised lots of fun problems in lining up the texture to match.

AlbertaRoseTransomWindowLeftSide

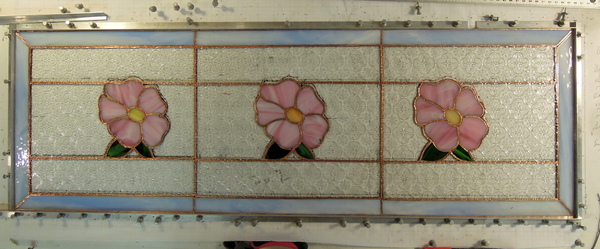
In the next picture the panel is now ready for soldering.

StainedGlassAlbertaRoseTransomWindowReadyforSolderingJuly2014

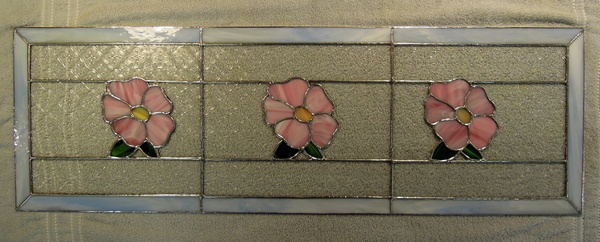
The next photo shows the window soldered and ready for patina.

StainedGlassAlbertaRoseTransomWindowSolderedJuly2014

Once we have soldered a window and have applied patina we then construct and attached a 1/2 inch zinc came frame which we do not patina. We ensure that the solder joints in the window are attached both front and back to the zinc frame with cleaning and patina touch ups of these joints. Once completed then the window is polished and thoroughly cleaned.

StainedGlassAlbertaRoseTransomWindowJuly2014

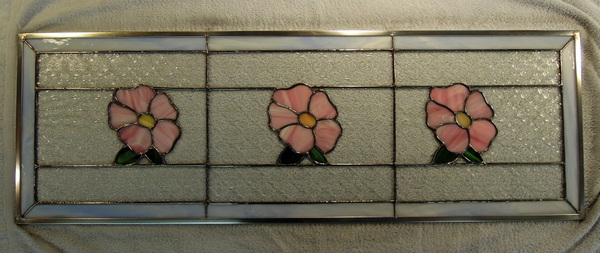
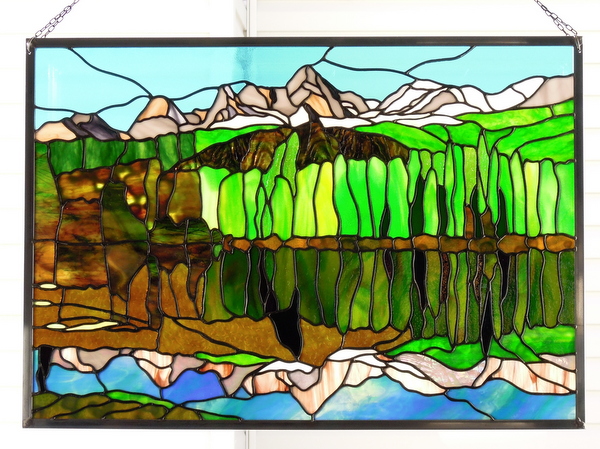
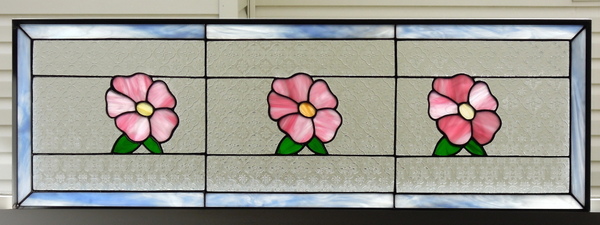
Here is the completed window.

StainedGlassAlbertaRoseTransomCompletedWindowJuly2014

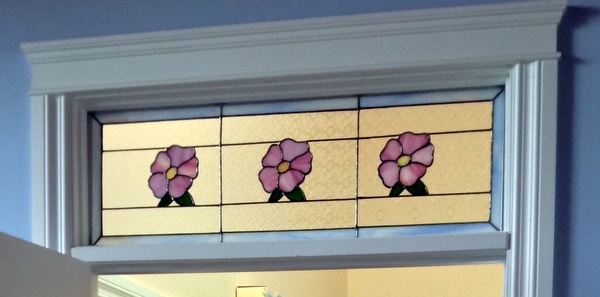
Our clients were most pleased and installed the window later on the day it was delivered to them, this picture was taken from the reverse side as they wanted to have the front facing into their daughters bedroom as she loves Alberta Roses.

StainedGlassChornyJuly2014

 Design by Flory & Bob Wilkins

Lamp Repair – Restoration July 2014

A picture story of a broken Stained Glass Lamp Shade. The picture below shows the damage to the lamp’s crown.

StainedGlassLampBrokenCrownJuly 2014

The next photo shows the one large lamp panel with serious cracks in it.

StainedGlassLampBrokenPanelJuly2014

This last photo shows the broken bottom panel. There were 4 crown pieces, 1 large panel and 1 bottom panel which were broke.

StainedGlassLampBrokenBottomPanelJuly2014

When we take out broken lamp pieces we use a large low sided box filled with crumpled newspaper for support of the lamp shade, then slowly and carefully remove the broken panel. What helps in this process is to take steel wool #0000 only to clean the old solder seams of their dirt and patina, as it allows faster melting of the old solder and less chance for heat build up to damage other pieces.

StainedGlassLampRemovalofBottomBrokenPieceJuly2014

The next photo shows the lamp shade with all of the broken pieces and the crown removed. Then all of the edges need to be thoroughly cleaned and scraped of all of the old foil, using an X-acto knife, #0000 steel wool along with Kwik Clean. Then new foil has to be applied and burnished on to the existing cleaned areas and the new pieces to be used.

StainedGlassLampBrokenPiecesRemovedJuly2014

The next picture shows the crown fully restored.

StainedGlassLampRestoredCrownJuly2014

Once all the new pieces have been properly soldered in place, with beading as required along the edges. In this case we did our best to match the soldering techniques used by whoever made the lamp. Then the completed lamp shade is cleaned with Kwik Clean to remove flux. We then mixed some black and copper patina’s together to match the antique brass look. After that another cleaning with Kwik Clean, then Clarity stained glass polish applied, with final polishing using soft cloths and tooth brushes for the seams. Then double checking when on a lighted lamp stand which allows to see and find polish etc that we may have missed.

StainedGlassLampCompletionJuly2014

 Designer Unknown


Island Lake Update July 2014

Island Lake is now completed and here it is in glorious sunshine. You can see the complete construction story with a quick search on our website. Enjoy

StainedGlassIslandLakeJanuary2015

Designed by Paned Expressions Studios

Island Lake panel now has all of it’s final pieces cut and rough ground. Now all that remains is for these pieces to be fitted then foiled and once that it done the panel will be ready for soldering

IslandLakeJuly2014