100+ Year Old Door Panel Restoration

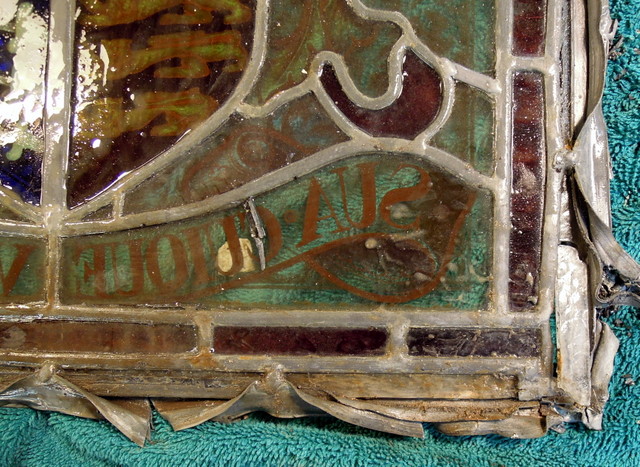
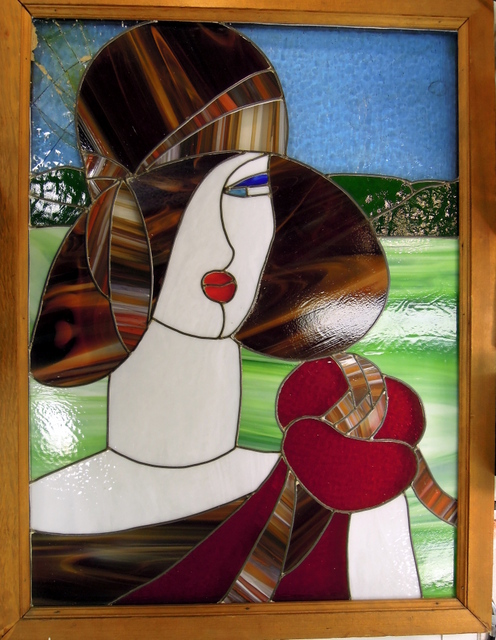
This old came stained glass door panel had reached the point where if it was not removed from the door it was in great jeopardy of collapsing and being ruined forever. As you can see in the picture below, the frame was coming apart. While not visible when you pushed slightly on the center, the whole panel moved in and out a lot and would completely fall apart if the door was slammed or someone pushed on the panel to open the door. Only 1 piece of glass was missing (the amber piece on the top right) while the rest was all in its original state. When restoring these old came panels we securely fasten a sheet of white freezer paper over the whole panel, then using carbon paper we do a rub to have a pattern for restoration.

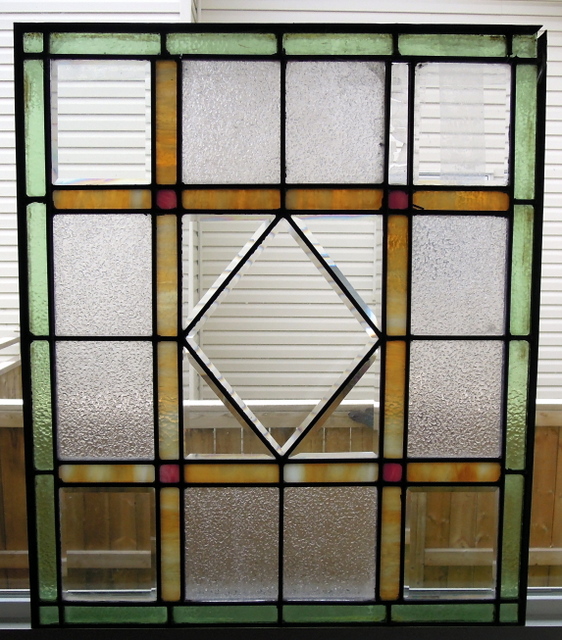
The panel measured 22 inches wide by 26 1/16 inches high including it’s 3/8 inch zinc frame. The process involves carefully removing the panel and transporting it to our studio. In the restoration process we take multiple photographs and number each glass piece. The challenge in this restoration was the very wide came originally used and not replaceable. The reason for the wide came was for the bevels which were made from very thick glass.

This presented a problem for restoration as we needed to use H Round Zinc Came 1/4 inch face to ensure a strong interior strength coupled with 3/8 Zinc Border Came. We solved this problem by using a standard grit Aanraku Ripple Bit. This allowed us to grind down each side of these very thick bevels so they could be inserted into the new round zinc came. However it was imperative that we grind each side equally so we practised on a bevel that we had in stock. Then through trial and error we set up the ripple bit to ensure removal of the same amount of glass from each side of the bevel before  inserting them into the panel.

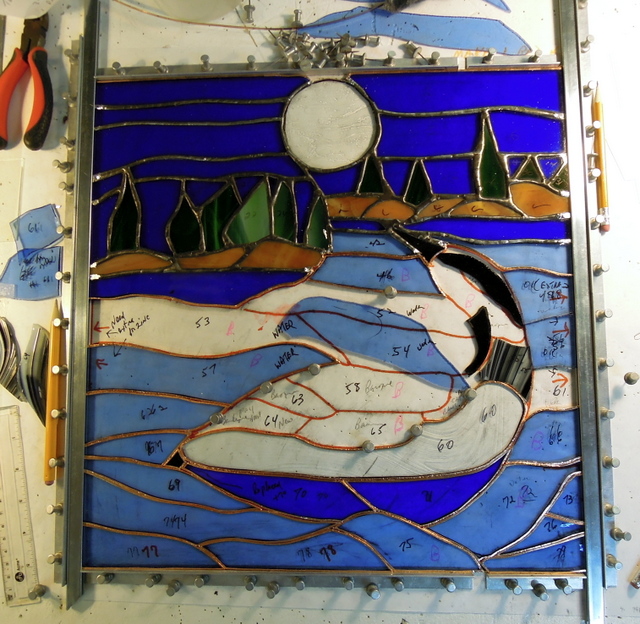
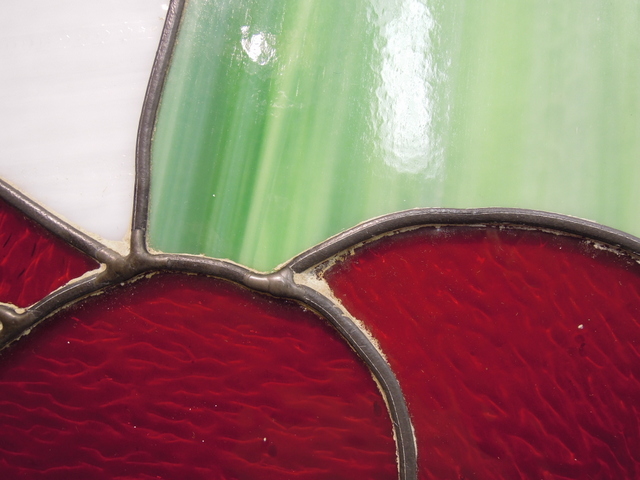
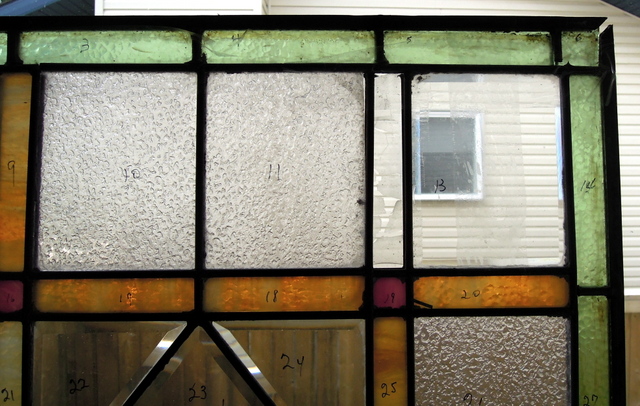
The following photo shows a portion of the panel with all of its pieces numbered, we then carefully took the panel all apart and that is when we found out how very thick the glass was in these old bevels.

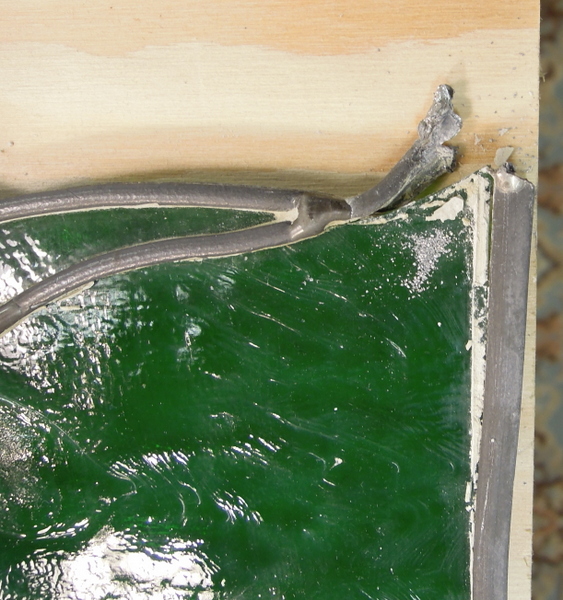
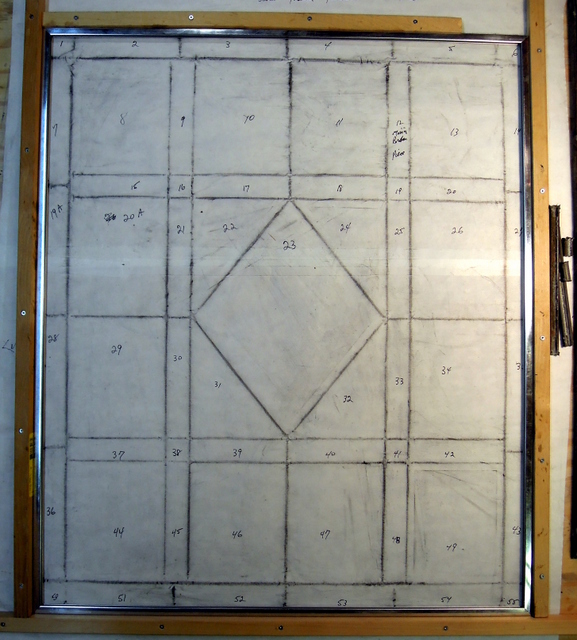
In the next photo we have now taken the rub pattern and set up a wooden frame, complete with the 3/8 zinc border came, ensuring that we have the measurements exactly so it will fit back into the original wooden door which our client was getting restored. Please note on the right side there are a couple of pieces of the very old came originally used.

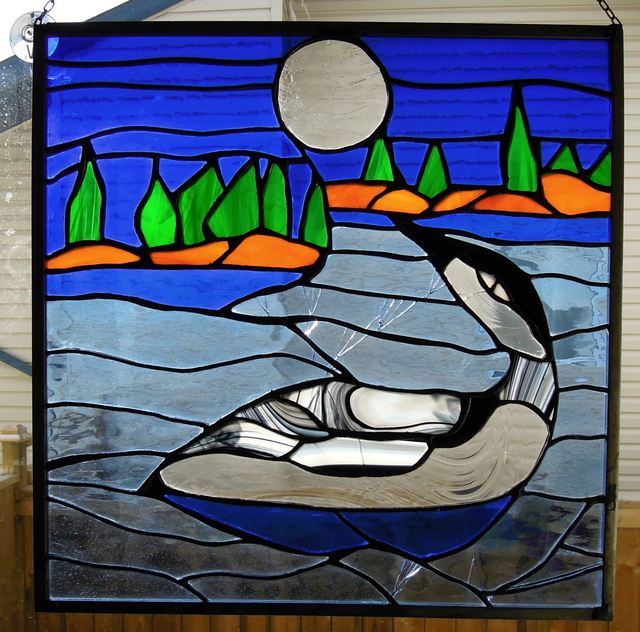
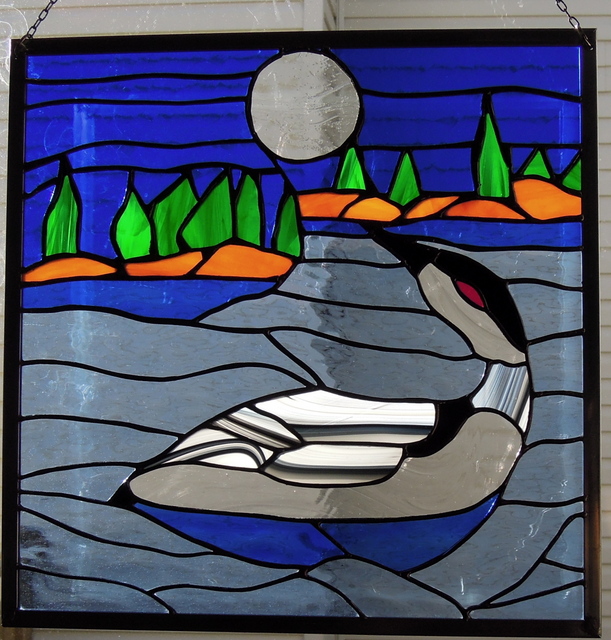
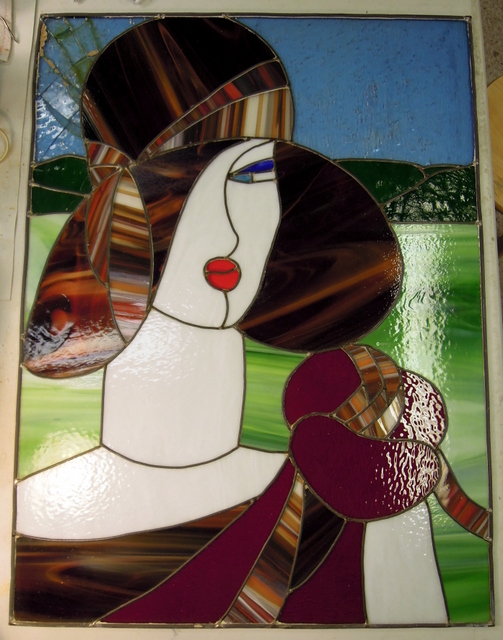
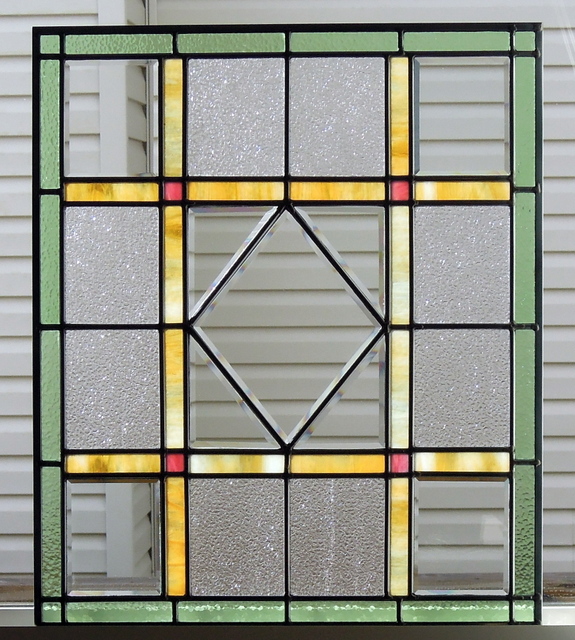
The last photo is of the completely restored panel. Fortunately we had a piece of old glass that matched the one broken piece in the panel. We cleaned each piece of glass, carefully measuring and cutting the H zinc came. After soldering the joints we use Glass Pro Stained Glass Putty to cement the glass and then cleaned with whiting, after which we applied Clarity Polish. In this particular case we did not patina any of the zinc came as we felt it was not required in this restoration.

Designer Unknown – Restoration by Bob & Flory Wilkins

Mexican Lamp Repair October 2018

Our client’s family obtained this lamp many years ago and in our investigation we found out that it most likely was made in Mexico some 40 – 50+ years ago. The lead came that held all of the individual glass pieces together, was made by rolling flat led through a roller which gave the came it’s teeth marks on both the inside and outside of the came. For that reason we had no way of replacing the came and wanted to make sure that the lamp was as original as possible.

We had to take the loose pieces of glass ( numerous ones had completely fallen out ) and after cleaning each one, we manipulated the came with small tools along with a wooden awl. All of the glass was hand cut and grozend by hand (no grinders in those times), which left lots of chips on the pieces as can be seen in the pictures.

The first photo shows the restored lamp shade.

As you can see in the next photo the came was quite bent out of shape, which allowed the glass pieces to fall out, fortunately our client never lost any of those pieces.

Using our hands and a wooden awl we manipulated the came where the glass pieces had fallen out.  Also on the inside of the shade we re-soldered each joint to further stabilize and strengthen the shade. It was also necessary to apply some solder around the outside at the top of the shade. After cleaning with Kwik Clean to remove flux and dirt, we appling Clarity polish and after it dried we then finished off with lots of rubbing with soft cloths and tooth brushes.

What is neat about this old lampshade with all of it’s open spaces between each piece of glass is that it gives off a colorful collage of colors on the surrounding walls when in use.

Designer Unknown lamp restored by Bob & Flory Wilkins 2018

110+ Year Old Family Crest Restoration

Coming soon will be the full story of this very old Family Crest Restoration. This picture is just a very small portion of this historic piece of stained glass, which had an amazing beginning, ocean travel, institution display, escaped the wrecking ball, travelled across Canada and eventually ended up in our studio to be restored. It is quite a story – stay tuned.

Artist to be announced at a later date

Loon Panel Restoration 2017

A client from Rimbey Alberta brought us this panel which if memory serves us correctly had been knocked off the window by her cat. When doing restorations like this we first do a rub by laying over the panel a taped down piece of white freezer paper. We then take carbon copy paper and rub the entire panel which traces the solder lines to the paper and that paper then serves as a guide to rebuild and restore the panel.

This panel was originally made by our clients daughter and we wanted to save as much as possible of her work when restoring this stained glass loon panel.

Then we removed the frame and proceeded to remove the necessary pieces of broken and other glass. In this case we worked from the bottom up and did not proceed beyond the dark blue glass below the brown colored glass as all from there to the top of the panel was still intact.

Fortunately we had matching replacement Spectrum Glass to replace the broken pieces.

The next photo shows the rebuilding process. We had to use quite a lot of new glass in the lower half due to the breakage and to restore proper fitting of the pieces.

When one does this without taking the whole panel apart, it is necessary to first solder together all of the new pieces, then placing some thin clear glass under the restored part in order to bring it up to the same level as the original top portion of the panel. This is required to ensure that new pieces connect properly at the same level. At the request of our client we changed the loon eye to red.

We also installed a 1/2 inch new zinc came frame around the panel.

After soldering we clean the flux off with Kwik Clean, take steel wool (#0000 – which does not scratch glass) to the solder seams. Then apply black patina, again cleaning with Kwik Clean and finally applying Clarity (Kem Pro) stained glass polish.

Lady Art Deco Panel Restoration

A client from Calgary had this beautiful large lady came panel which had fallen and the sky glass was broken. In addition the soft came edging was coming apart and the whole panel needed to be restored along with new sky glass. The panel measured approximately 25 inches wide x 33 inches high.

stainedglassladypanel2016

The 2nd photo shows the panel after being taken out of its wooden frame. When the panel fell both sky blue pieces were broken however other than a small crack in one of the darker greens the rest of the glass survived the fall.

stainedglassladypanelrestoration2016

The original artist had used soft lead came for the outer frame and in addition a lot of the came cement had been left on the glass as shown below. When the panel fell it jarred loose many of the old came joints.

closeupofladypanel

closeupladypanel2

We then numbered each piece of glass, photographed the panel in detail, then took the panel all apart, cleaning each piece as we went along in the restoring, rebuilding process, starting at the bottom of the panel.

We had a beautiful piece of Bullseye, Clear, Egyptian Blue Opal #002064-0030 which we used for the sky and it enhanced the overall beauty of the panel. With the cracked piece of the dark green horizon glass we just added in another came joint as we did not want to replace that glass.

We decided that as this was such a large panel we upgraded the came used to RH – 12 and also put a 3/8 inch zinc outside came for added strength. After soldering the joints we cleaned off the flux using Kwik Clean and compressed air to ensure all liquid was removed from between the glass and new came.

We had an opportunity to obtain a new Stained Glass Putty by Glass Pro, which we found to be excellent to work with. Once the panel was cleaned with whiting, we scrubed all of the lead came with  #0000 steel wool and then apply black patina. After which we use Kwik Clean again to clean the panel again before applying a coat of Clarity Stained Glass Finishing Compound.

Once the polish is dry we then use several soft cloths along with tooth brushes to ensure a bright clean finish.

Here is the finished reconstruction, remounted in the heavy wooden frame. In due course our client in Calgary will be sending us a photo of the panel once she decides where to hang it in her home.

stainedglassrestoredladypanel2016

Designer Unknown


Page 3 of 10«123456»...Last »