This Cattle Brand Bar S Reverse G now hangs proudly in a home in West Central Alberta.
Along with this picture there are 6 others detailing this panels construction.
After polishing and cleaning we then carefully drill 2 properly measured holes in the zinc came, attach rings and chain. The completed panel measured 20 x 20 inches.
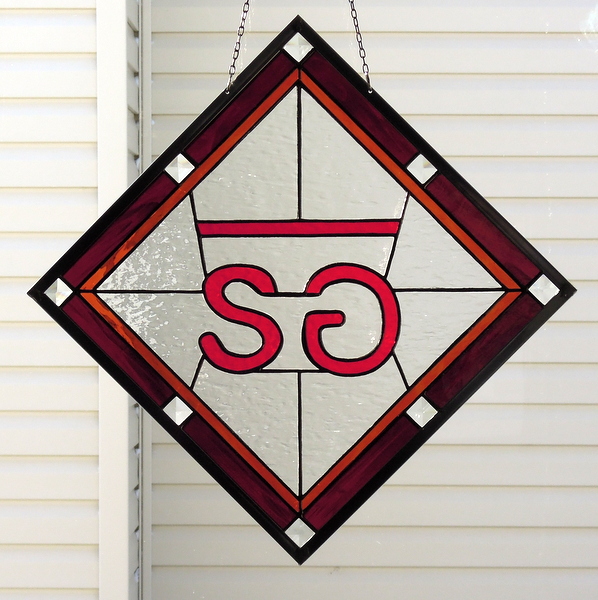
Design by Bob & Flory Wilkins
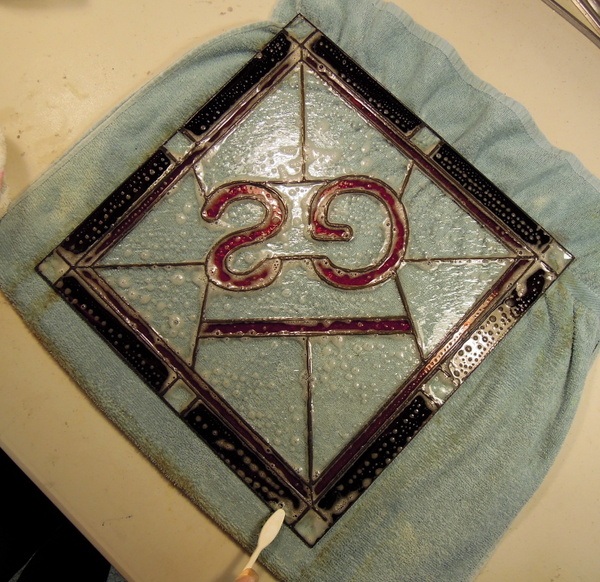
Once the black patina has been applied we then clean the panel with Kwik Clean, this photo shows the panel upside down. We then attached a 1/2 Zinc Came U Channel frame ensuring that all joints that meet the frame a securely soldered on both sides. We then clean those joints with steel wool, apply black patina then clean again with Kwik Clean. Then we apply Kemo Pro Polish to both sides and once dry spend a fair amount of time polishing and cleaning the panel using a soft cloth and tooth brushes. We also go around each seam with folded paper towel, along with spending time examining the panel in sunlight to ensure that each piece of glass and it’s seams have been completely cleaned and polished.
Once both sides of the panel are soldered we use #0000 steel wool to clean all of the solder seams. Never use any other grade of steel wool than # 0000 as anything else will scratch the glass.
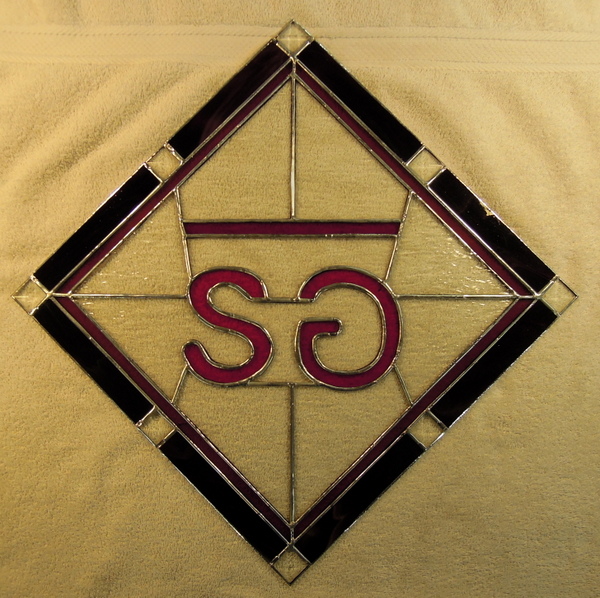
The panel is now ready for soldering.
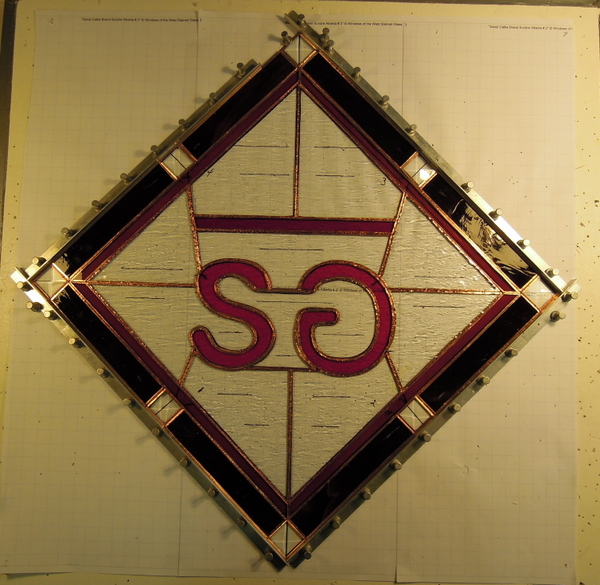
Once we were satisfied with the letters and after adding a small lighter amber colored Spectrum Waterglass frame edge, we then used Spectrum’s Clear Vecchio glass to fill in the centre of the panel. Here again our saw and small grinder heads were used to get these pieces to fit around the letters.
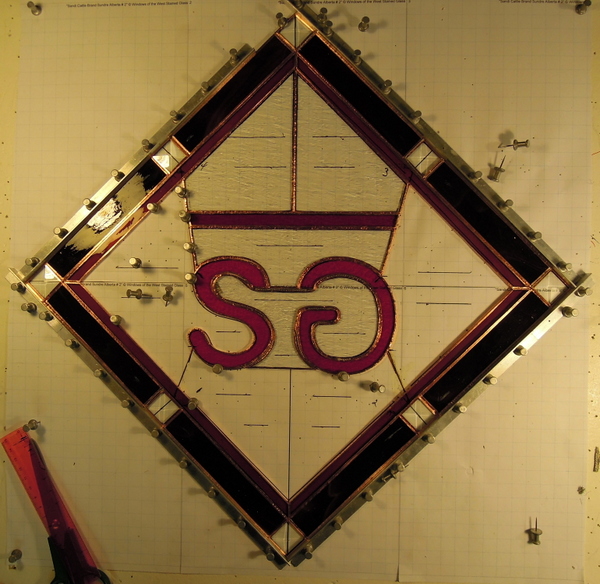
The next photo shows the completion of the surrounding edging where we used a Spectrum dark amber glass. The brand was made from Spectrum’s Cherry Red Rough Rolled. The S and reverse G are each 1 piece of glass cut on our Taurus 3 Ring Saw. It was some what tricky to get all of the edges ground correctly but patience along with our Glastar Allstar grinder using 2 small grinding bits made the work relatively easy.
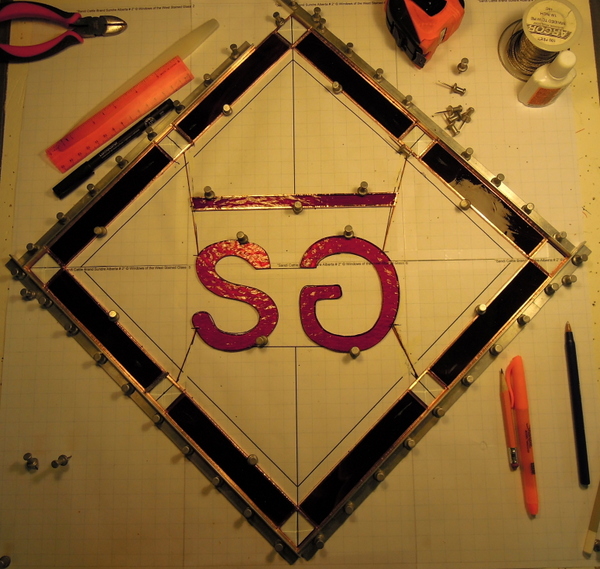
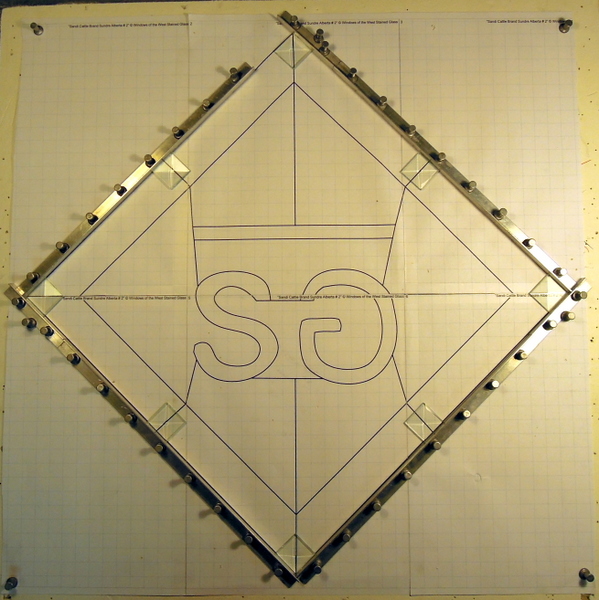
For her husband’s Christmas present this year a client wanted their cattle brand in a stained glass panel. The registered brand is Bar S Reverse G and shown. Around the edge we use 1×1 inch bevels. This picture shows the initial layout of the brand panel. We use the Morton layout block system along measurements and a small square to ensure exacting size of the panel.
