Tiffany Style Large Lampshade Restoration 2023

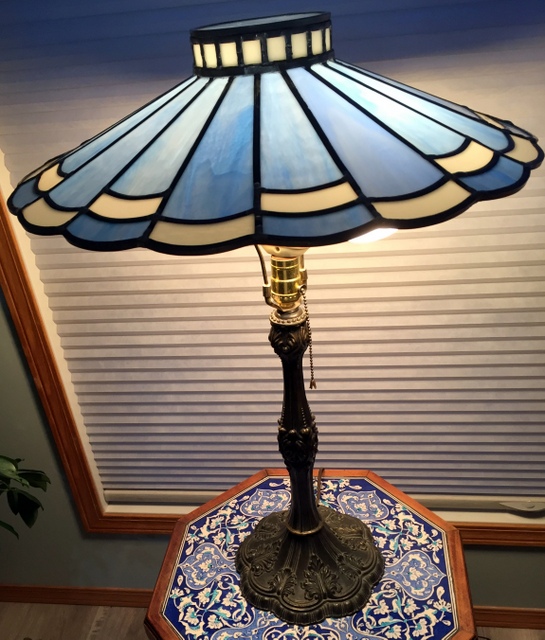
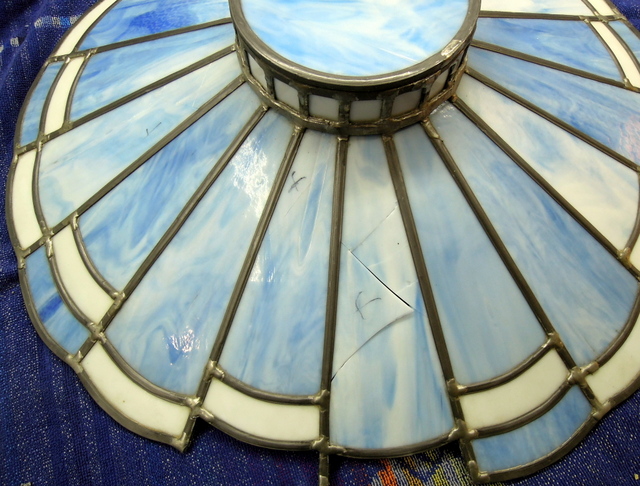
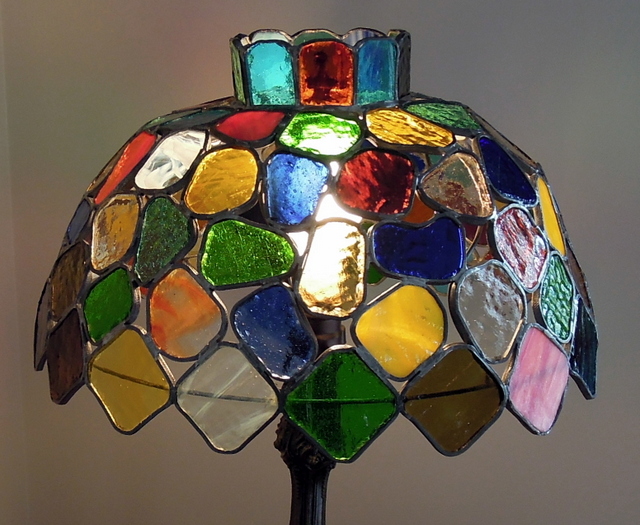
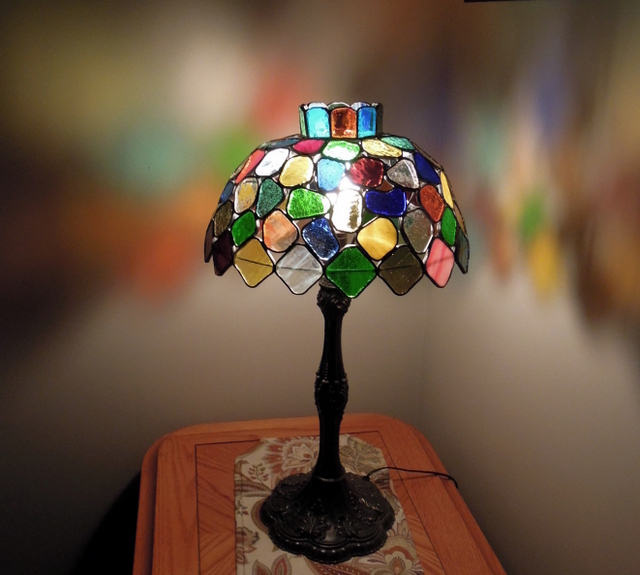
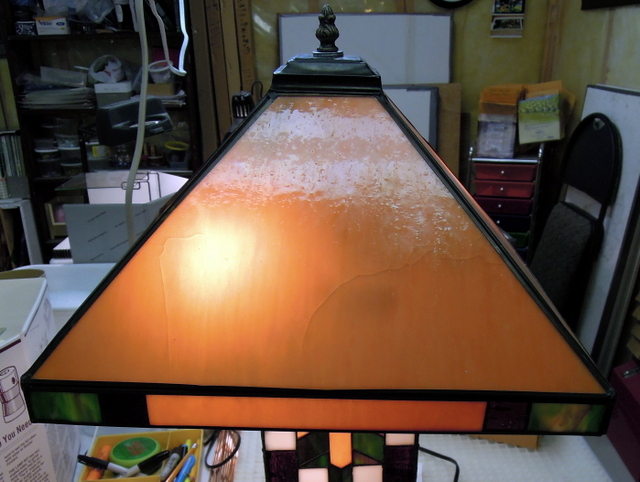
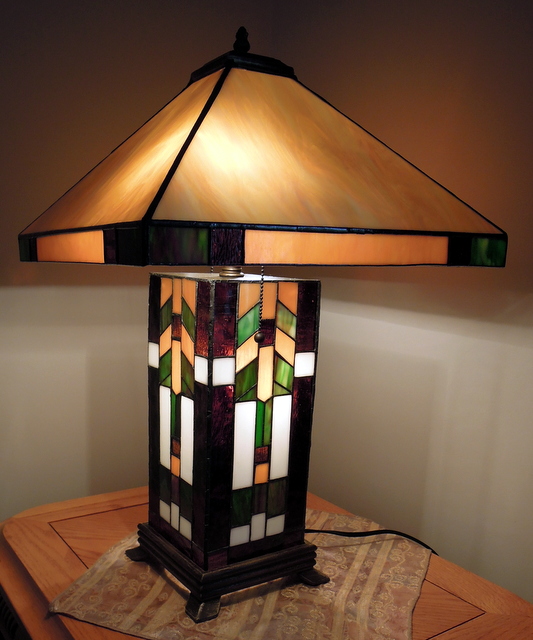
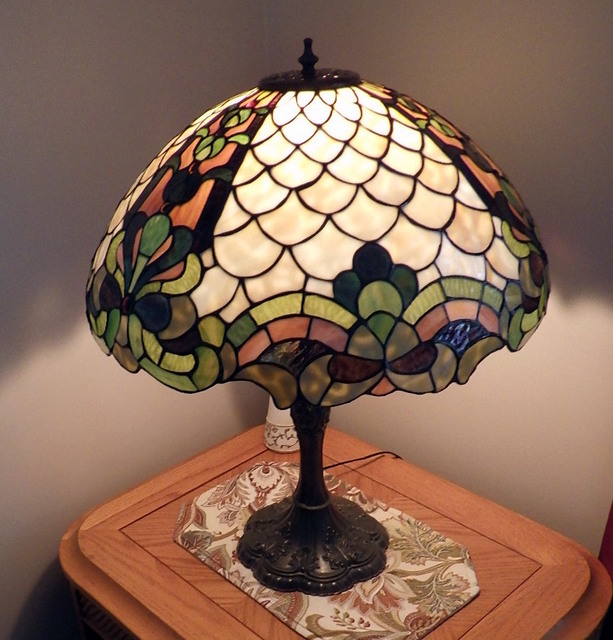
Late this summer and early fall we repaired this large Tiffany style lampshade for clients who live in North West Alberta.


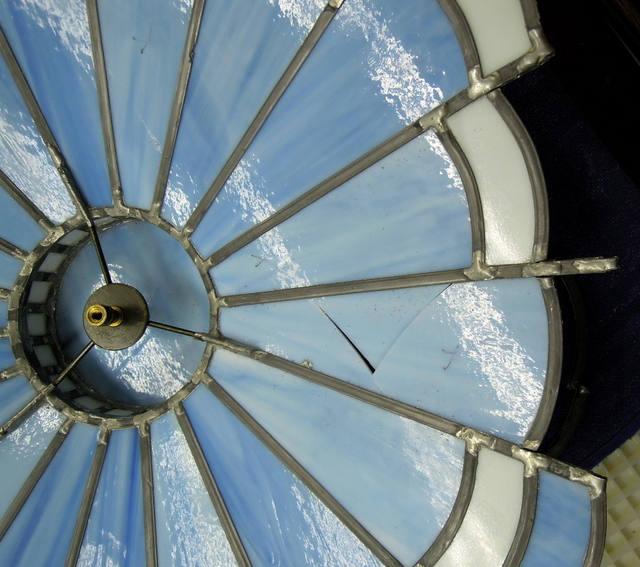
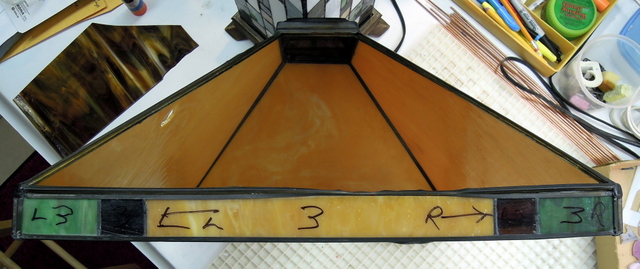
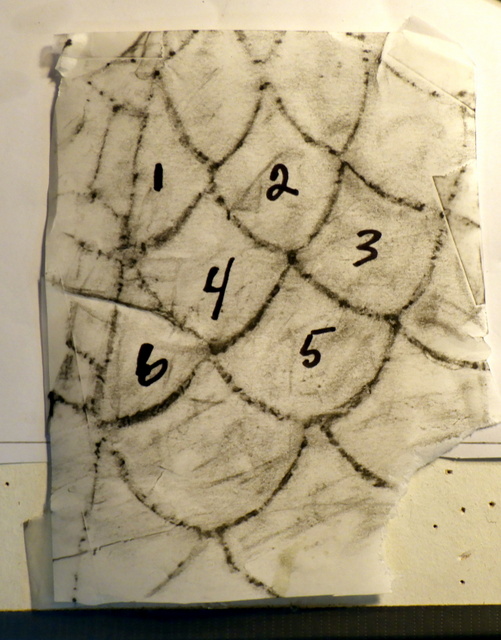
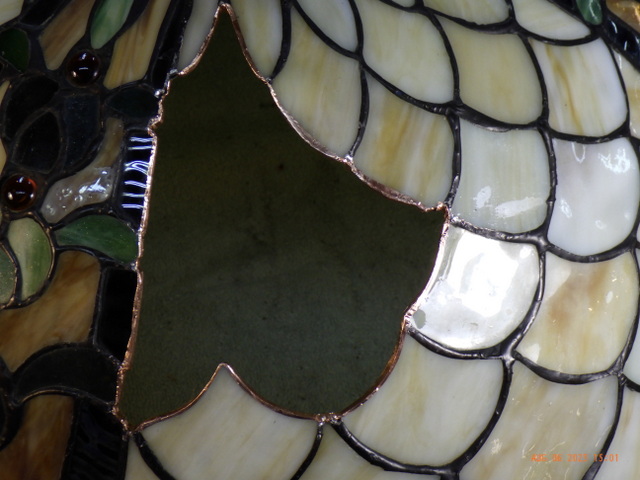
Before removing the broken pieces of glass we do a rub using white freezer paper rubbed with black carbon paper. After carefully removing the broken glass we do a through cleaning and then re foil the edges. Then using the paper rub we then cut out each piece and glue the paper to the replacement glass. In this case we were very fortunate to have the same glass on hand.

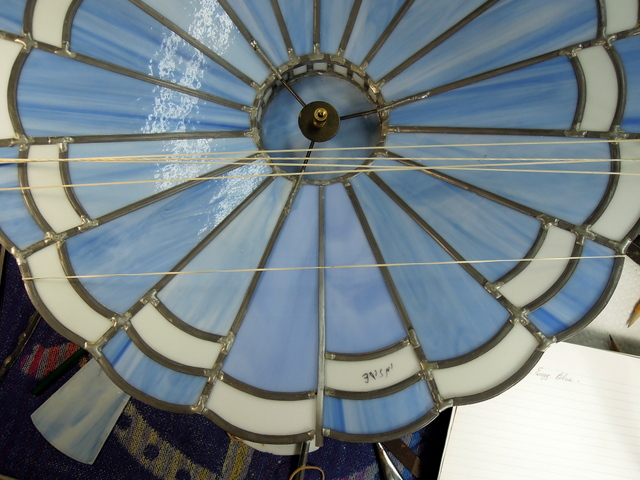
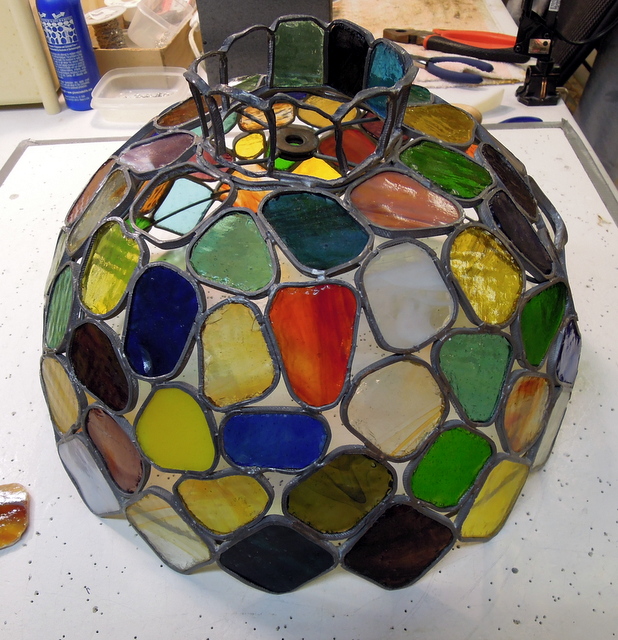
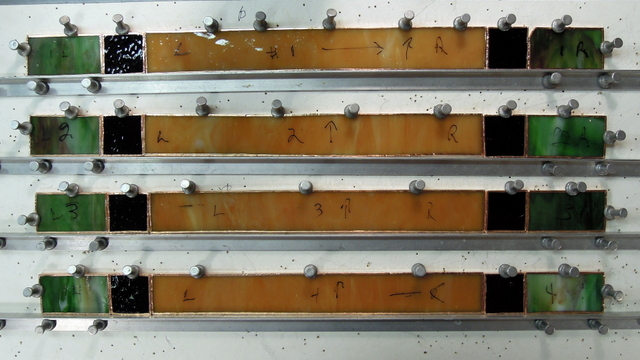
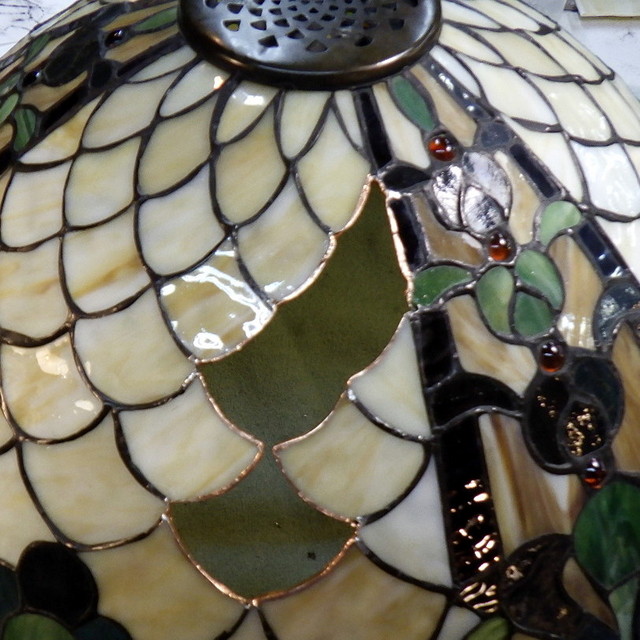
The next picture shows this portion of the lampshde in partial repair. We fit each piece of glass and hold them in place with scotch tape and then tack solder the pieces. Eventually placing the lampshade in a large flat box filled with newspapers to keep it level while soldering the seams.

The picture below shows the lampshade upside down in the box filled with newspaper which holds it in level place for soldering but it does take time and lots of levelling adjustments to end up with proper solder seams.

The next photo shows the new foil applied.

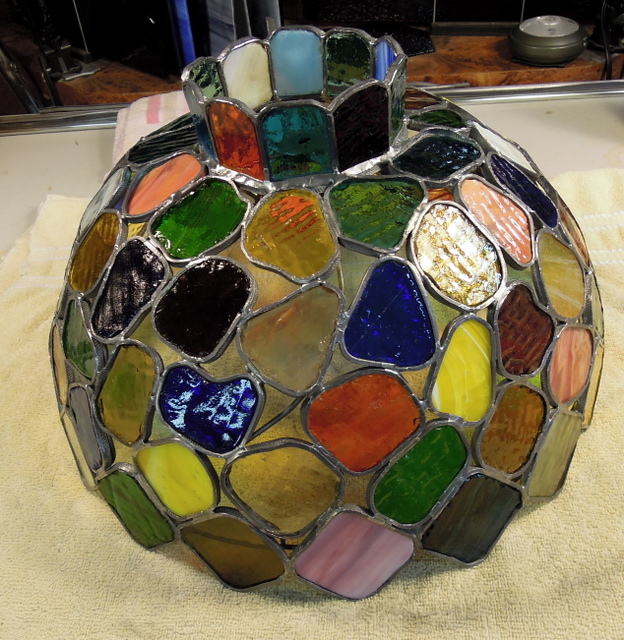
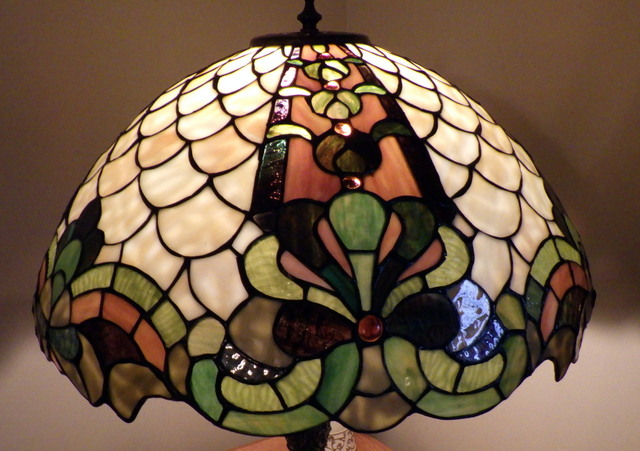
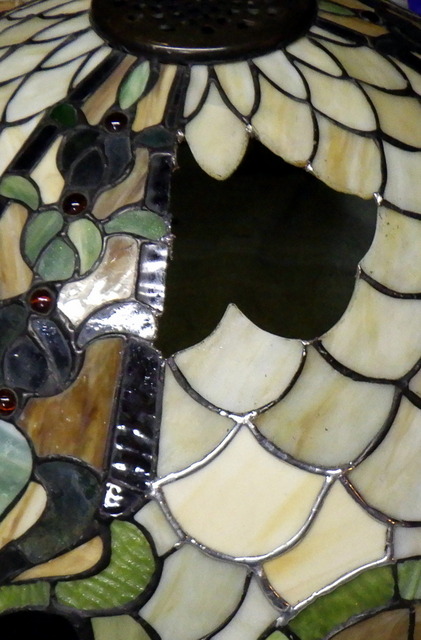
This next photo shows the other side of the lampshade which also had broken glass.

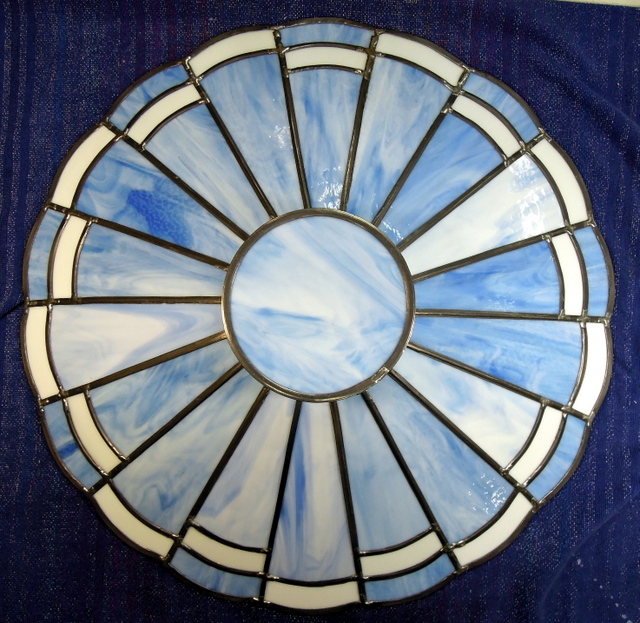
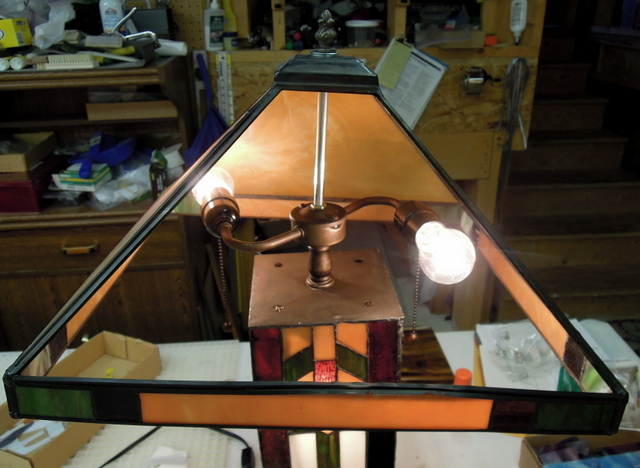
Initally we solder the outside lamp seams then do the inside seams. Once soldering is completed, we clean the entire lamp surface with Kwik Clean. We take steel wool to the new solder seams, then apply black patina, clean again with Kwik Clean, then apply Clarity Polish, finally buffing with a soft cloth and tooth brushings of the solder seams on the whole lampshade.

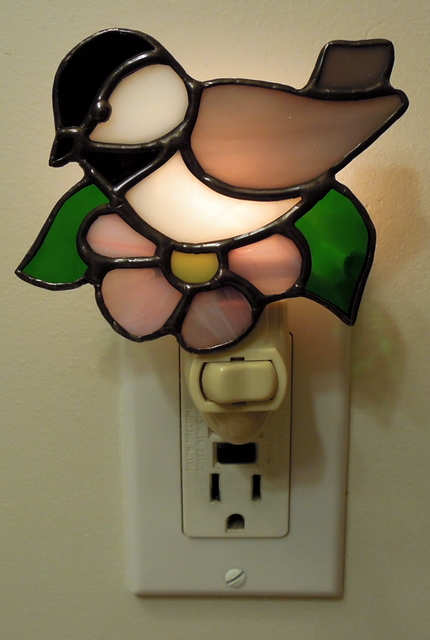
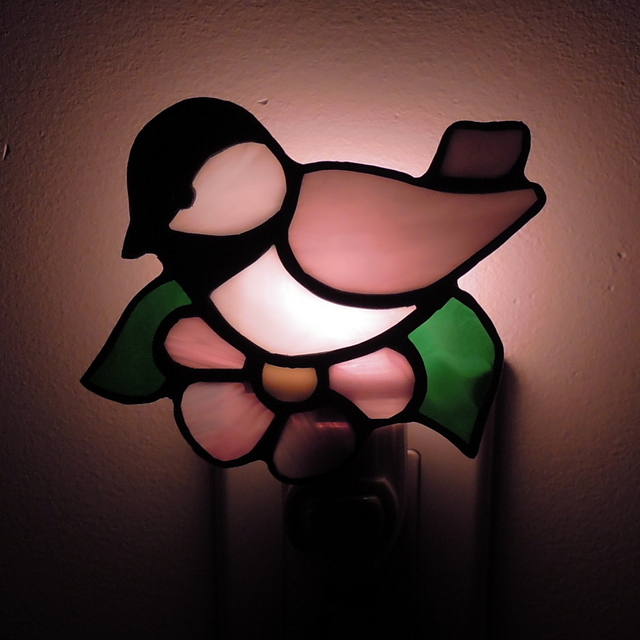
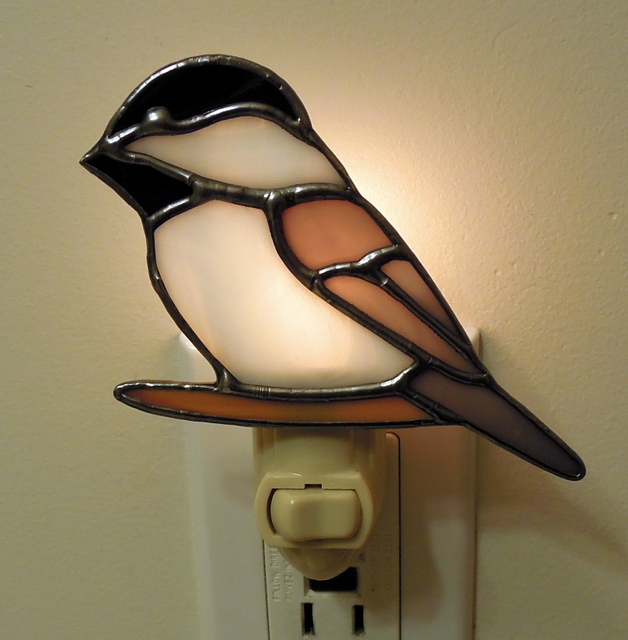
Our clients we very pleased with the repairs.

Unknown Artist made this from Tiffany Style Lampshade Design

Chickadee Nite Lights 2020

The Wild Bird Store in Calgary asked if we could make Nite Lights for them. They wanted handmade in Alberta Stained Glass items.  We converted our Chickadee and Alberta Rose design for one and came up with another Chickadee design for the 2nd one.

These Nite Lights measure approximately 4 inches wide x 3 inches high and they are attached to an Ivory Base night light fixture with a white light bulb.

These Nite Lights can be bought at the Wild Bird Store in Calgary – located at 5901 – 3 Street SE., Calgary, Alberta. The link to their website is    https://www.wildbirdstore.ca/

Modified for a Nite Light from an Original Design by Casey Koller

By Bob & Flory Wilkins


Modified for a Nite Light from an Original Design

by Brian McMillan & Lucinda Doran – Birds of North of America Volume 1

by Flory & Bob Wilkins

Heirloom Lamp Repair 2019

This lampshade was made some 43+ years ago by a family member. It survived many moves over the years but eventually suffered 3 broken panels. Our client who lives in Central Alberta brought it to us in the fall of 2019 and fortunately we had the exact same glass to complete repairs and restoration.

The first photo shows the restored lampshade now being enjoyed by our client on a daily basis.

The next shows the 3 broken panels – 2 of which were beside each other and the 3rd one was over to the left with the faint black check mark on it.

In order to put new glass in this lampshade we first used a small hacksaw and cut through the lead came removing the broken and unbroken pieces. As 2 of the panels were together we had to replace the center piece of lead came. When taking out the broken pieces we ensured that each broken panel piece was then taped together so we could use it for a pattern when making the new panel pieces.

A problem we encountered especially with the 2 broken panes beside each other was that after fitting and replacing the glass along with the one new piece of lead came in the center of those 2 broken panels was that the lamp had sprung apart. Rather than trying to have Flory hand hold the shade together while re-soldering the joints we used some larger rubber bands which after some maneuvering held the lampshade back together quite nicely before soldering the new joints. The original lead came used was handmade and over the years we have come across several old repairs with this type of came. The difficult part is trying to match new came to the old came as close as possible.

This last photo shows a top view of the restored lampshade. We cleaned both sides of the lampshade with Kwik Clean using toothbrushes and then repolished it with Clarity Stained Glass polish. We used a combination of soft polishing rags, toothbrushes, X-acto knife blades and paper towels to complete it along with lots of elbow grease.

Built by a family member in the mid 1970’s

Original Lamp Designer Unknown

Mexican Lamp Repair October 2018

Our client’s family obtained this lamp many years ago and in our investigation we found out that it most likely was made in Mexico some 40 – 50+ years ago. The lead came that held all of the individual glass pieces together, was made by rolling flat led through a roller which gave the came it’s teeth marks on both the inside and outside of the came. For that reason we had no way of replacing the came and wanted to make sure that the lamp was as original as possible.

We had to take the loose pieces of glass ( numerous ones had completely fallen out ) and after cleaning each one, we manipulated the came with small tools along with a wooden awl. All of the glass was hand cut and grozend by hand (no grinders in those times), which left lots of chips on the pieces as can be seen in the pictures.

The first photo shows the restored lamp shade.

As you can see in the next photo the came was quite bent out of shape, which allowed the glass pieces to fall out, fortunately our client never lost any of those pieces.

Using our hands and a wooden awl we manipulated the came where the glass pieces had fallen out.  Also on the inside of the shade we re-soldered each joint to further stabilize and strengthen the shade. It was also necessary to apply some solder around the outside at the top of the shade. After cleaning with Kwik Clean to remove flux and dirt, we appling Clarity polish and after it dried we then finished off with lots of rubbing with soft cloths and tooth brushes.

What is neat about this old lampshade with all of it’s open spaces between each piece of glass is that it gives off a colorful collage of colors on the surrounding walls when in use.

Designer Unknown lamp restored by Bob & Flory Wilkins 2018

Kim’s Lamp Rebuild – Restoration 2016

When we picked up this lamp it had all 4 panels broken, however the 4 drop edges were all intact. The frame holding the shade together was made with flimsy metal.

stainedglassbrokenlampshade2016

The next photo is a close up of one of the edges which also shows the flimsy tin frame. The panel above this piece has also been removed. As the bottom edges were all intact we photographed each side after numbering each piece as well as marking them to ensure that when rebuilding this lamp that all went back together in it’s original places.

stainedglasslampshadedetails2016

The following photo shows all 4 edges after taken them apart, cleaning, foiling (with Venture Black Backed 7/32 Copper Foil), along with placing the bottom edges on a piece of Morton Layout Blocks to ensure a straight bottom edge.

stainedglassedgeskimslamp2016

The picture below shows the poor workmanship and the wobbly support stem for the shade.

In order to restore this lamp we had to make 4 new panels using Spectrum’s Light Amber Lamp Mix # 318-05S glass. We saved the vase cap and when rebuilding the lampshade we used Venture’s 1/4 inch Black Back Copper Foil. In addition to providing much needed support and long life of the lampshade we installed a 4 way spider.

Our client mentioned that the lamp shade was not supported very well, so we put in a longer standard size 3/8 inch threaded brass rod, which together with the spider support and 4 brass nuts  2 top and 2 bottom, plus a washer secured the lampshade to the lamp base in a very strong manner.

Another specific reason for the longer brass rod was that the lamp’s light bulbs were very close to the lampshades glass and their heat could have been another factor as to why the lampshade glass cracked.

stainedglasslamp2016

Once the shade was rebuilt, the new solder lines had black patina applied, then the whole unit was cleaned with Kwik Clean and then polished with Clarity Stained Glass Polish. We installed new appliance light bulbs 2 for the lampshade and 1 inside the base stand.

Our client was more than please with the end result and she now has a rebuilt, restored tiffany style lamp that will provide her with years of pleasure.

stainedglasskimslamp2016

Lamp Rebuild & Restoration by Bob & Flory Wilkins

Page 1 of 3123»