About windows


Website:
windows has written 397 articles so far, you can find them below.


Whimsical Owls

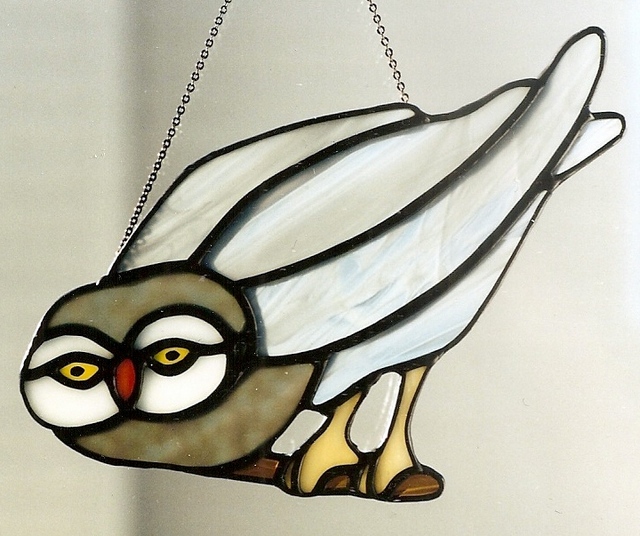
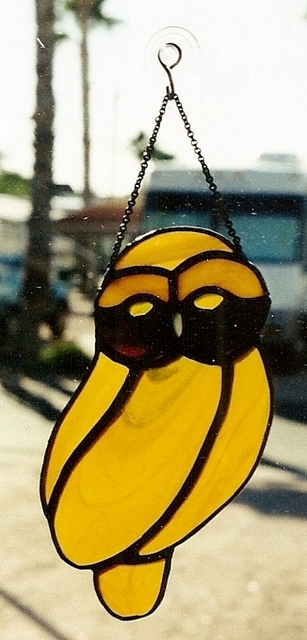
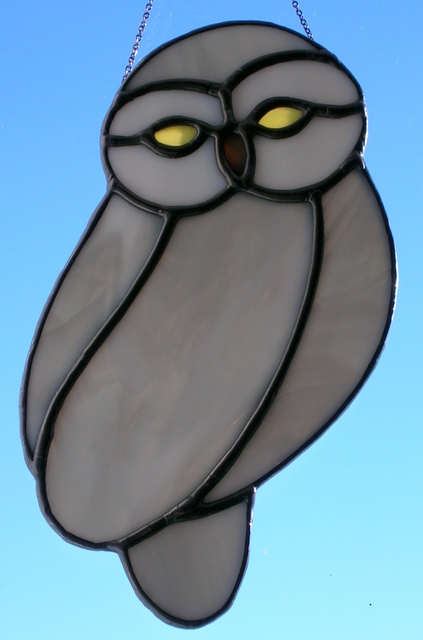
Quite a few years ago we made these Whimsical Owls. The first one measured approximately 7.5 inches wide x 4.5 inches high. The second and third ones approximately 6 inches high x 3.5 inches wide.

Enjoy

stainedglassowl


stainedglassowl1

stainedglassowl2

Designs by Connie Eaton

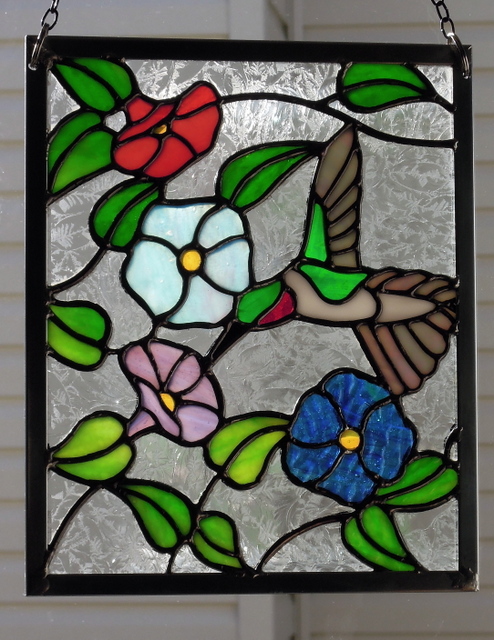
Hummingbird – Morning Glory Panel 2016

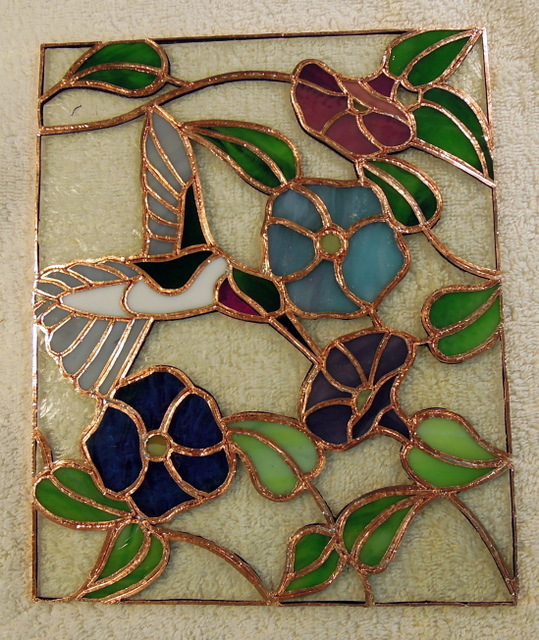
This hummingbird panel measures approximately 7.5 inches wide by 8.5 inches high not including the outside zinc frame.

It was commissioned this fall by a local client who is sending it to Clare, Nova Scotia as a Christmas present for her mother in law who loves hummingbirds and morning glories.

The background glass is clear single glue chip. For the wing feathers we used an iridescent grey Spectrum Glass. For the leaves a beautiful green Uroboros and for the morning glories a cranberry white Bullseye, Youghiogheny Heads & Tails for the blues and a Kokomo for the purple one.

stainedglasshummingbirdpanel2016

Design by Flory Wilkins

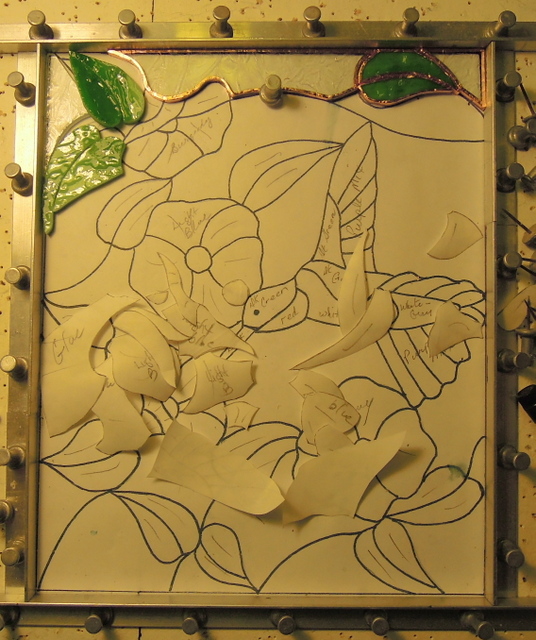
After completing the design we frame the pattern with the Morton Layout block system. We use white ceiling tiles doubled together as our pin board. We draw out each piece using white freezer paper which can be found at Safeways. It works very well in that one can clearly see the pattern lines through the freezer paper for tracing purposes. We then glue the pattern to the piece of glass we want to use ensuring that we have the correct flow of that glass for it’s relative location in the pattern design. Each piece is then ground to fit, foiled and burnished then the next piece is traced and the process continued until the panel is finished.

hummingbirdpaneldesignpattern

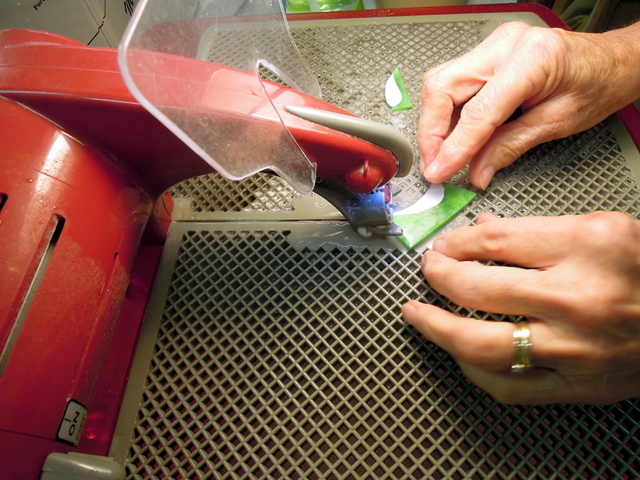
In the next picture we are using our Taurus 3 Ring Saw to cut the Uroboros glass used for the leaves. In this case as we had to reverse our pattern onto the glass as we wanted to use the textured surface on front of the panel.

hummingbirdpaneltaurus3ringsaw

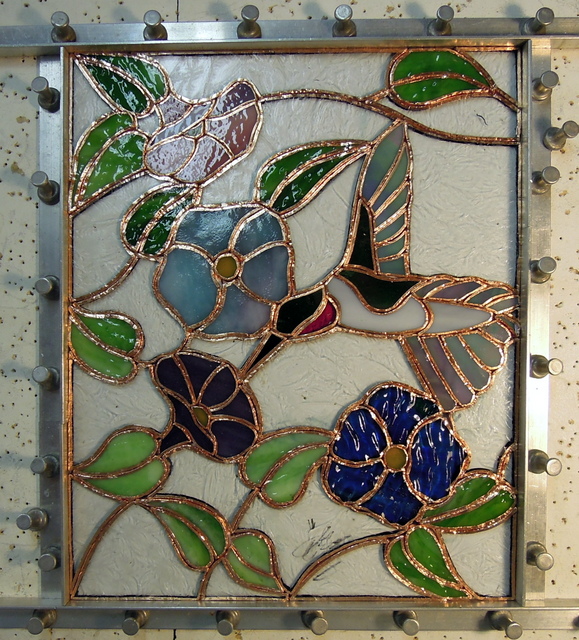
The following photo shows the panel completed and ready for soldering. We use 60/40 solder for the majority of our work.

stainedglasshummingbirdpanel

The last photo shows the reverse side after the other side has been soldered. You can see that using our methods of tracing and fitting each piece of stained glass, little solder seeps through.

hummingbirdpanelreverseside

Design by Flory Wilkins

Christmas Ornaments 2016

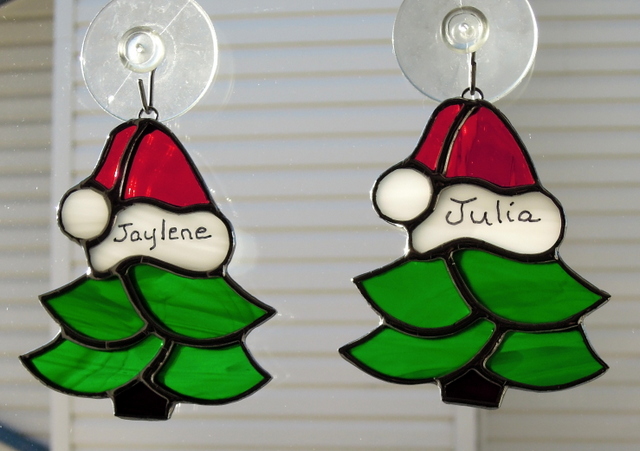
For Christmas time we always make a tree ornament for our neighbors daughters. This was our choice this year.

stainedglasschristmasornaments2016

Design by Deverie Wood – Light in Glass – Holiday Pattern Set – Spectrum Glass Free Patterns

Lady Art Deco Panel Restoration

A client from Calgary had this beautiful large lady came panel which had fallen and the sky glass was broken. In addition the soft came edging was coming apart and the whole panel needed to be restored along with new sky glass. The panel measured approximately 25 inches wide x 33 inches high.

stainedglassladypanel2016

The 2nd photo shows the panel after being taken out of its wooden frame. When the panel fell both sky blue pieces were broken however other than a small crack in one of the darker greens the rest of the glass survived the fall.

stainedglassladypanelrestoration2016

The original artist had used soft lead came for the outer frame and in addition a lot of the came cement had been left on the glass as shown below. When the panel fell it jarred loose many of the old came joints.

closeupofladypanel

closeupladypanel2

We then numbered each piece of glass, photographed the panel in detail, then took the panel all apart, cleaning each piece as we went along in the restoring, rebuilding process, starting at the bottom of the panel.

We had a beautiful piece of Bullseye, Clear, Egyptian Blue Opal #002064-0030 which we used for the sky and it enhanced the overall beauty of the panel. With the cracked piece of the dark green horizon glass we just added in another came joint as we did not want to replace that glass.

We decided that as this was such a large panel we upgraded the came used to RH – 12 and also put a 3/8 inch zinc outside came for added strength. After soldering the joints we cleaned off the flux using Kwik Clean and compressed air to ensure all liquid was removed from between the glass and new came.

We had an opportunity to obtain a new Stained Glass Putty by Glass Pro, which we found to be excellent to work with. Once the panel was cleaned with whiting, we scrubed all of the lead came with  #0000 steel wool and then apply black patina. After which we use Kwik Clean again to clean the panel again before applying a coat of Clarity Stained Glass Finishing Compound.

Once the polish is dry we then use several soft cloths along with tooth brushes to ensure a bright clean finish.

Here is the finished reconstruction, remounted in the heavy wooden frame. In due course our client in Calgary will be sending us a photo of the panel once she decides where to hang it in her home.

stainedglassrestoredladypanel2016

Designer Unknown


Mini Angels Lapel/Fridge Magnets December 2016

We have a client who wanted mini angels that could be used as a lapel pin and also end up being used as a refrigerator decorative magnet. We were successful in obtain a rare earth, 2 magnet combination that worked perfectly. We had to slightly enlarge our mini angel design to accommodate the magnetic strip. These mini angels were given away as gifts.

The first photo shows the complete collection on our refrigerator door.

stainedglassminiangelfridgemagnets2016

The next photo shows the mini angel on a lapel which is held by the magnetic strip attached to the reverse of the angel.

stainedglassminiangellapelpin2016

The following photo is a close up of one of the Mini Angels

stainedglassminiangelfridgemagnecloseup2016

Design by Flory Wilkins


stainedglassminiangelfridgemagnecloseup2016