Sunnybrook Farm Museum – Willowdale Zion Presbyterian Church

The Sunnybrook Farm Museum is located north of the Bower Mall in Red Deer Alberta.

Here is the link to the Sunnybrook Farm Museum.

http://www.sunnybrookfarmmuseum.ca/

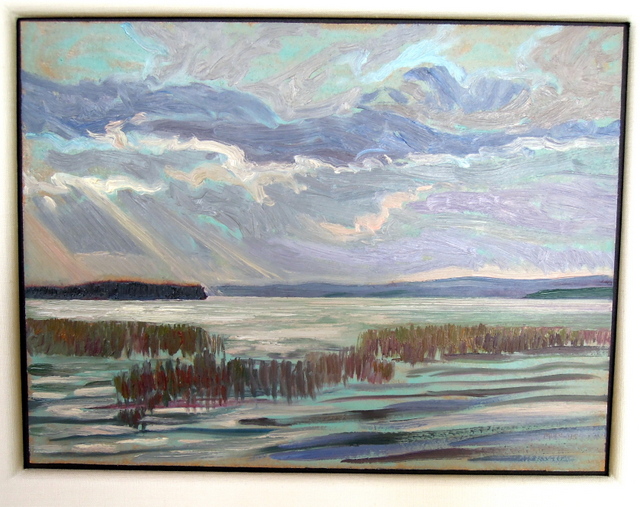
The picture below is of the Willowdale Zion Presbyterian Church at its new home on the museum grounds.

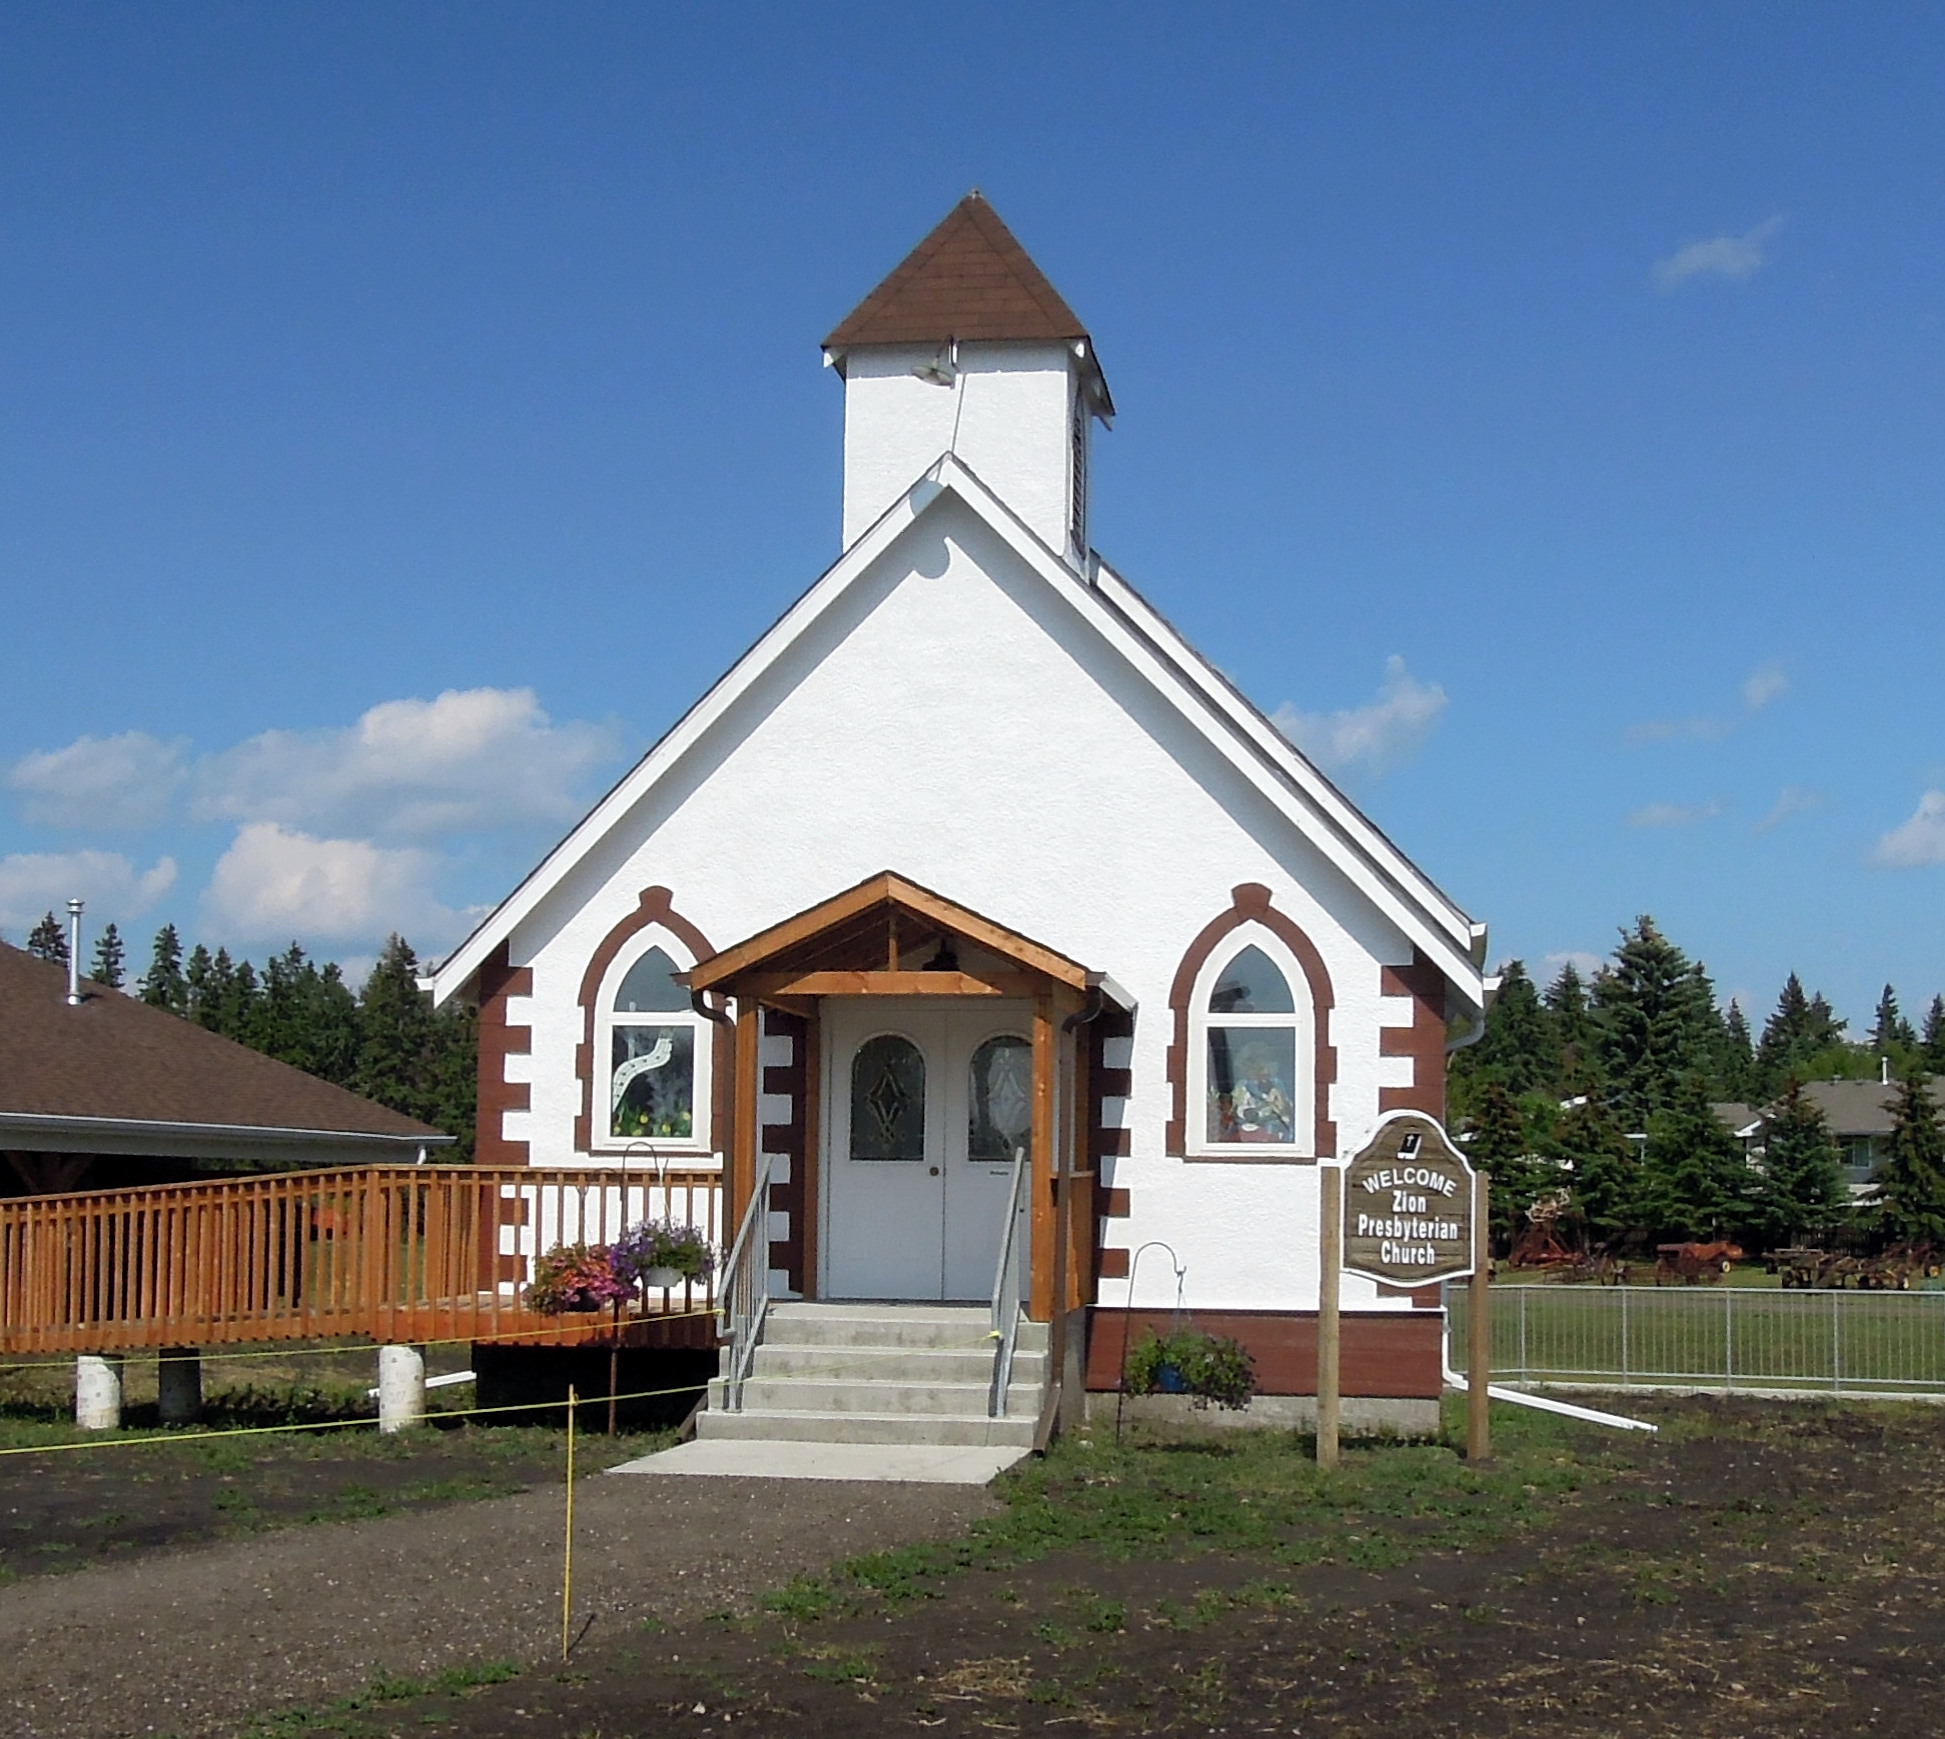
The photo below is of the church SE of Red Deer prior to it being moved in November of 2021 to the museum site.

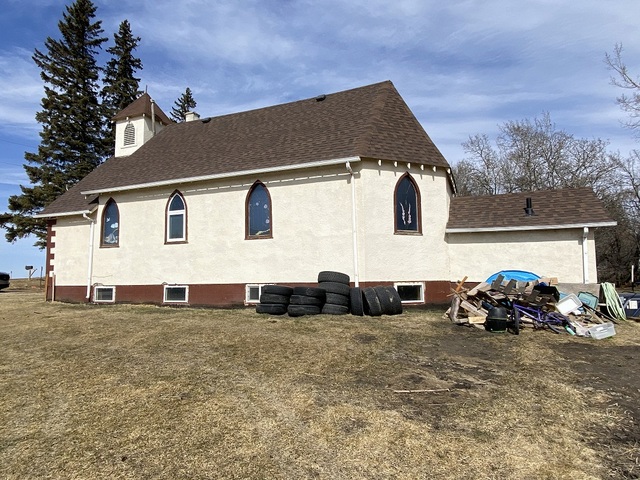
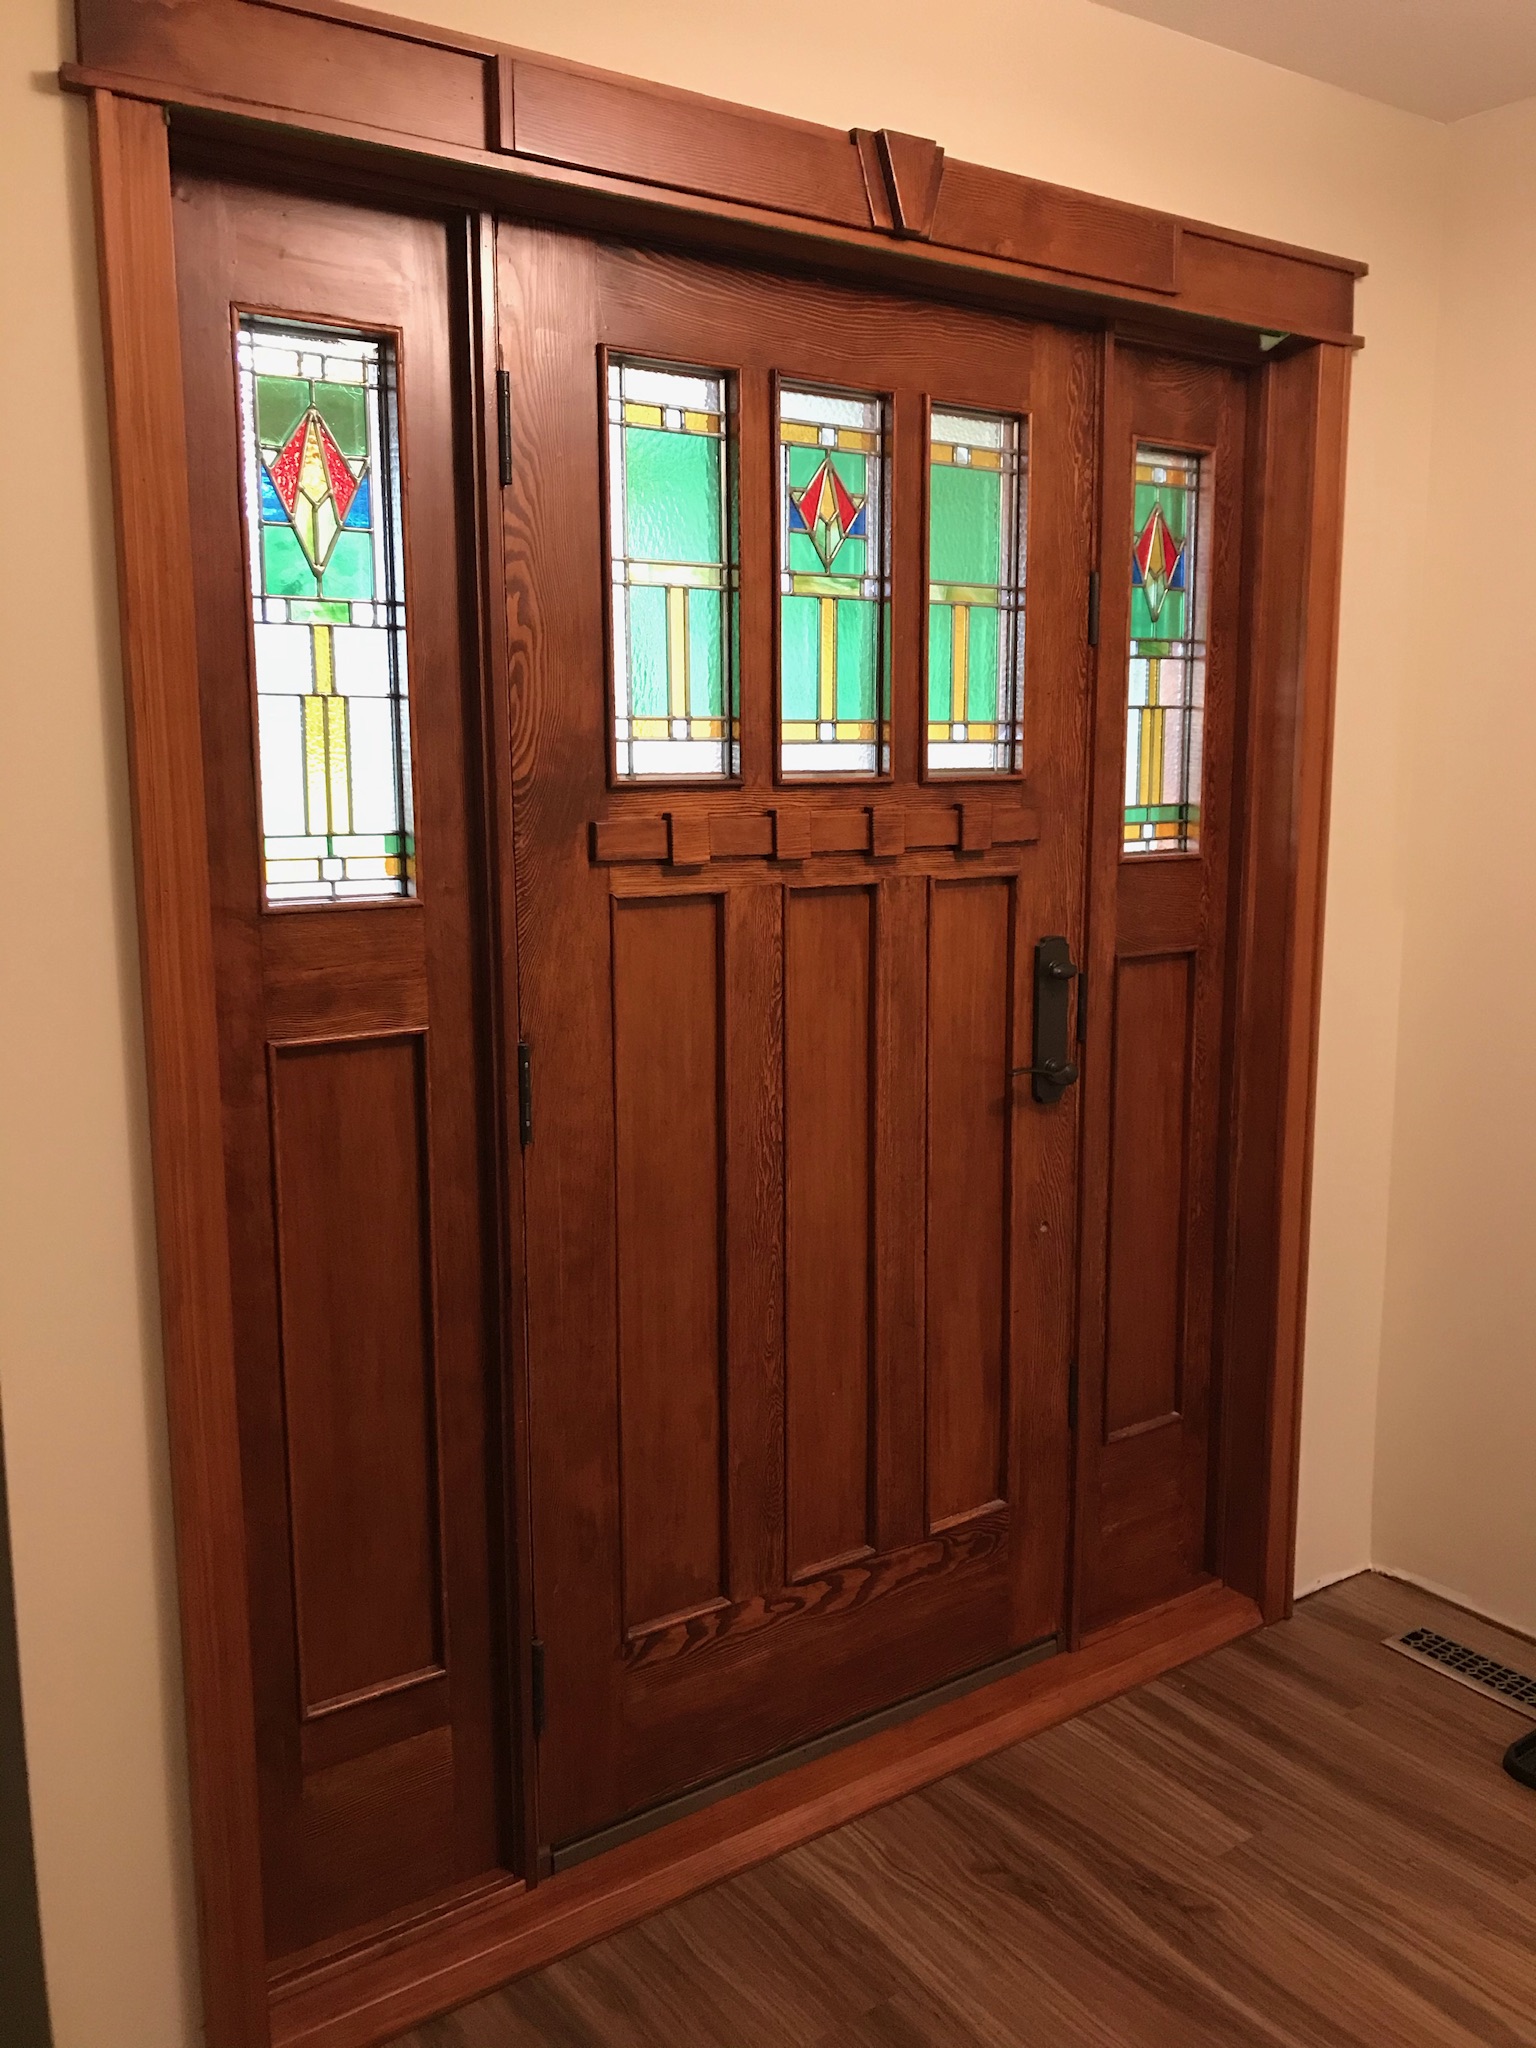
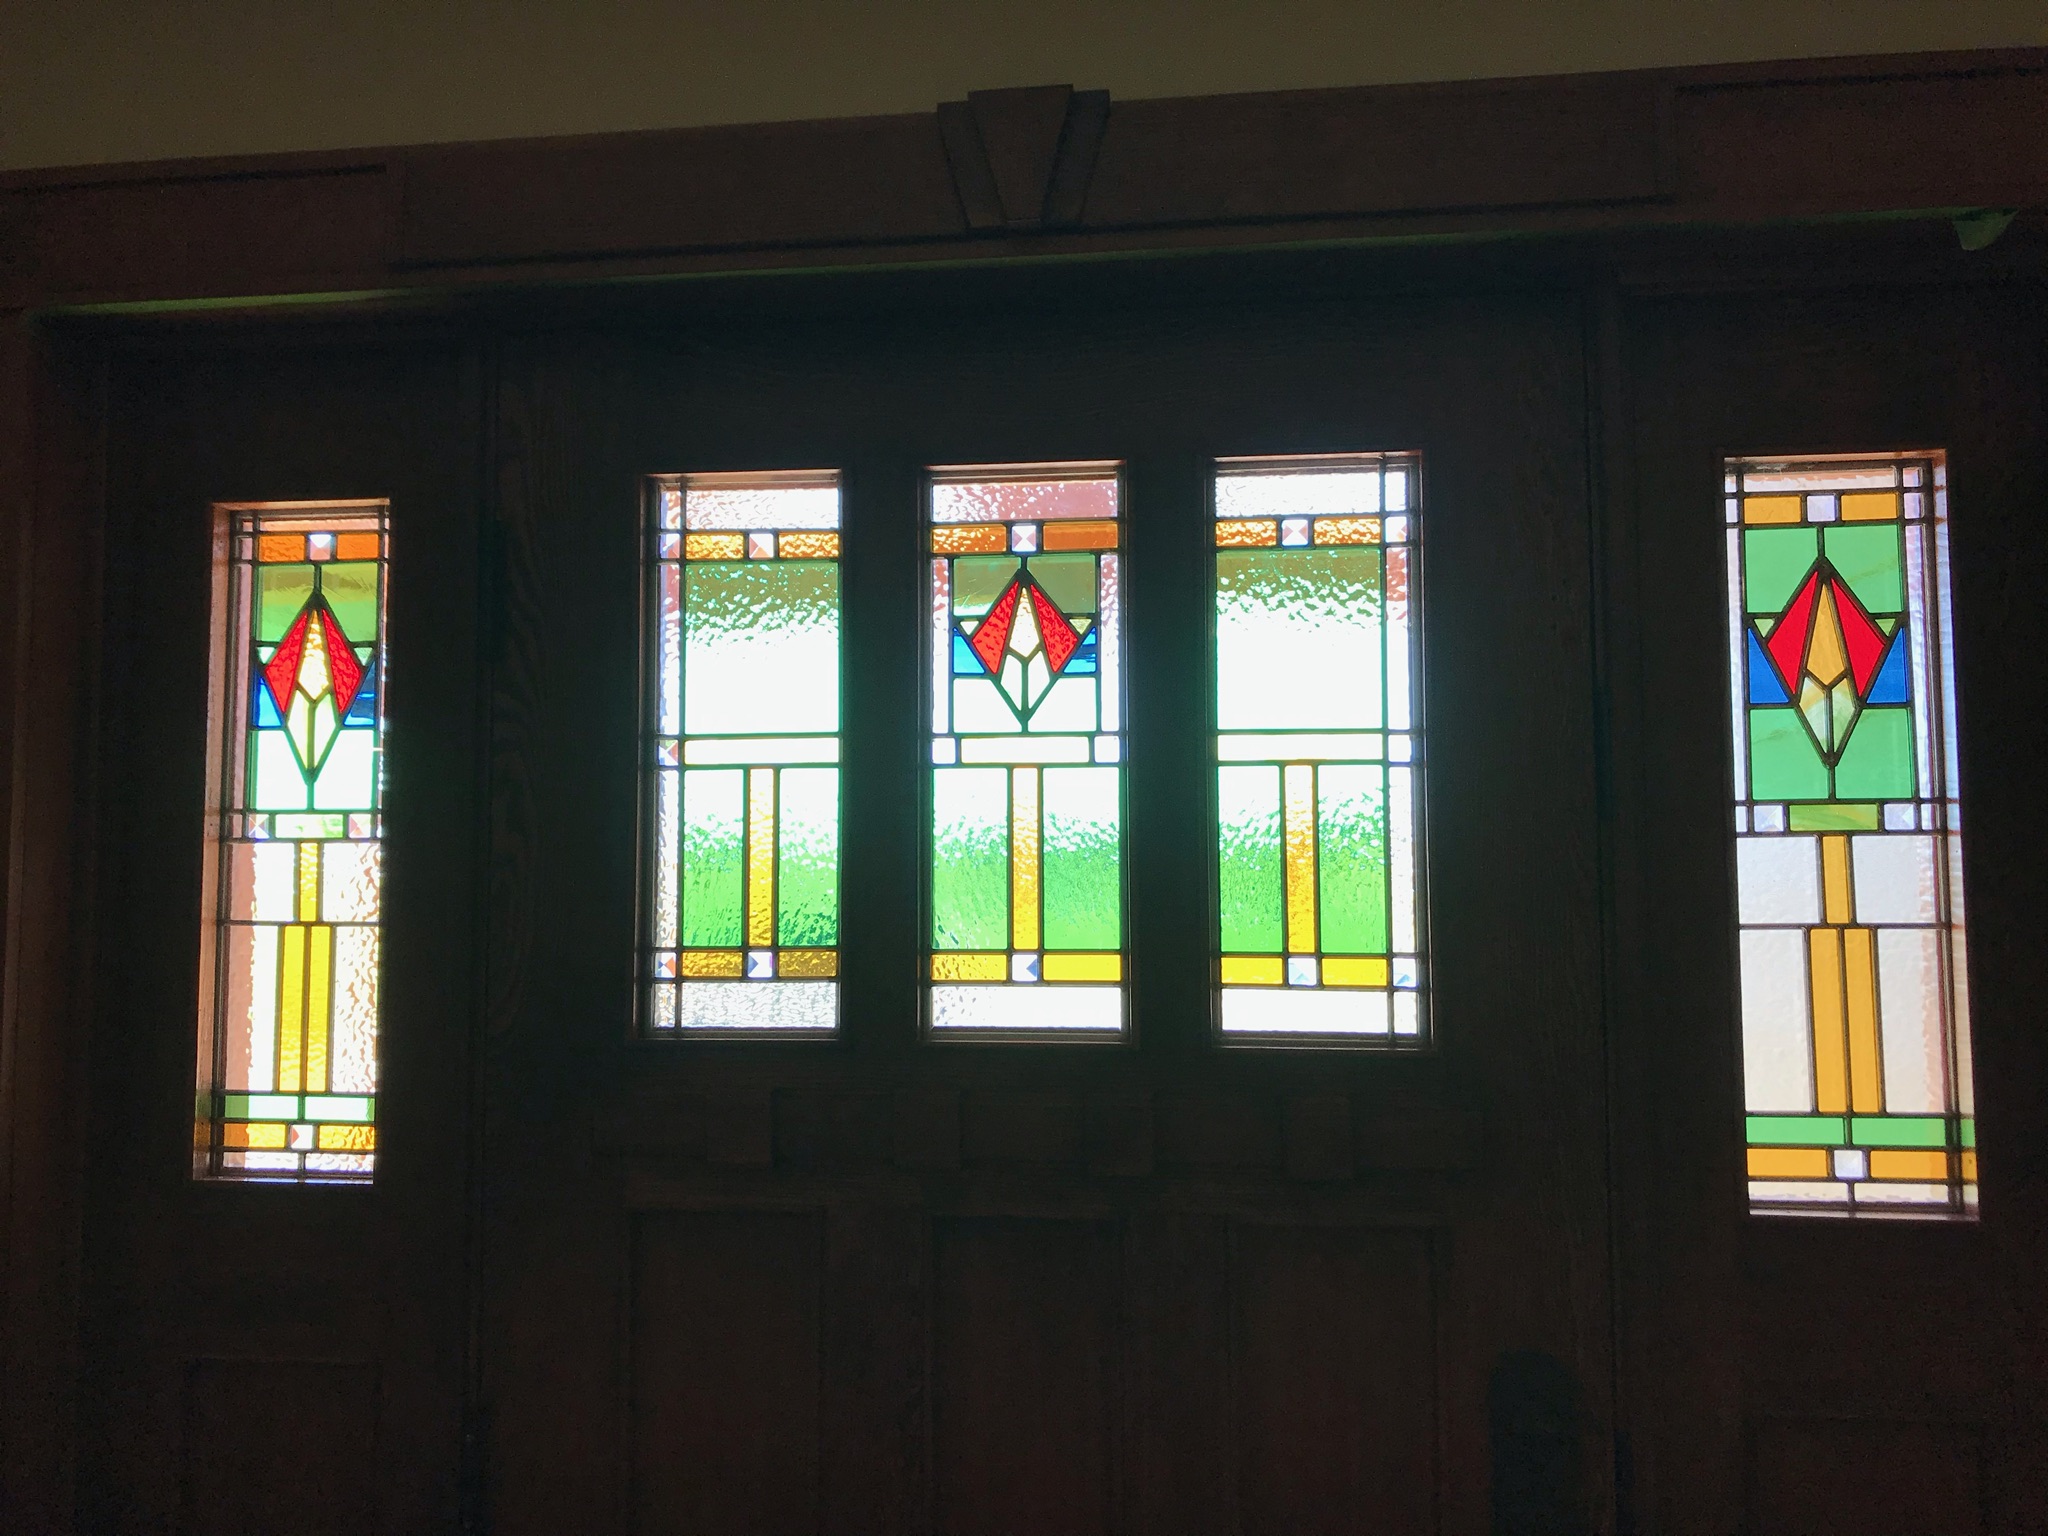
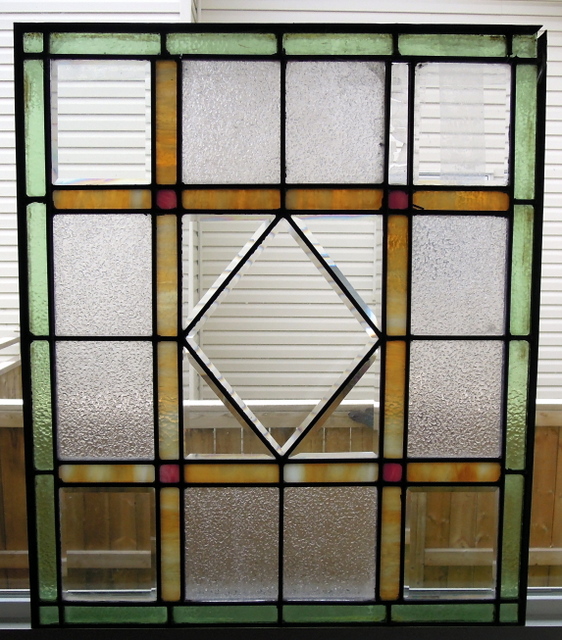
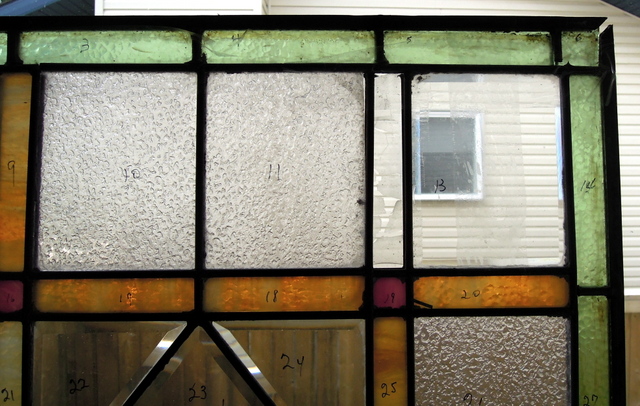
In the fall of 2021 Shunda Consulting & Construction Management Ltd contacted us regarding the moving of the Willowdale Zion Presbyterian Church from it’s rural location SE of Red Deer Alberta to the museum site. The church had 6 cathedral shaped stained glass windows measuring some 26 inches wide by 57 inches high and they wanted our input regarding how these windows could be preserved while they moved the church some 50 + kilometers. The church was moved in November 2021 and we were commissioned to do the work on the windows.

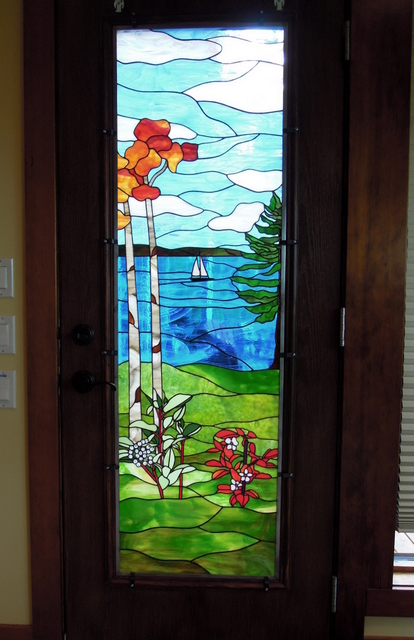
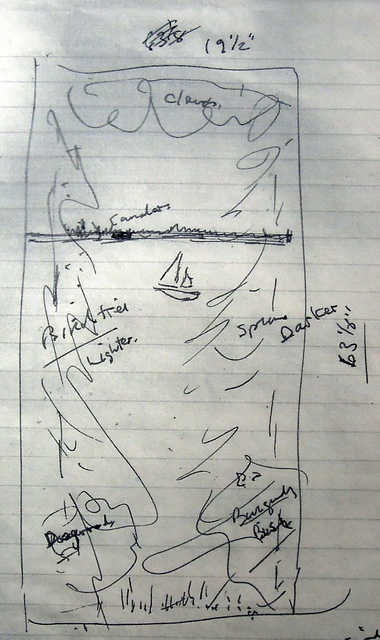
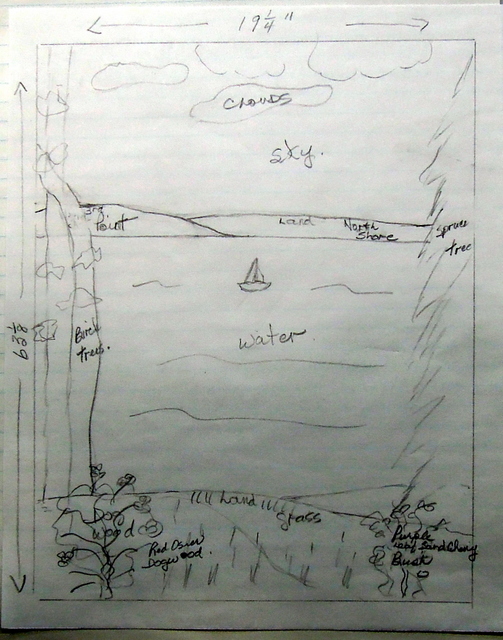
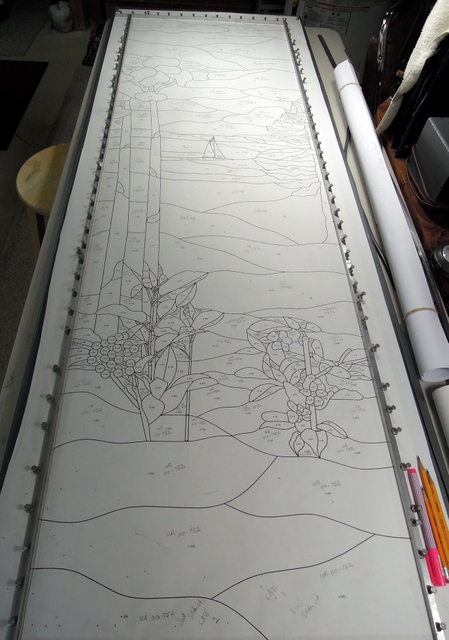
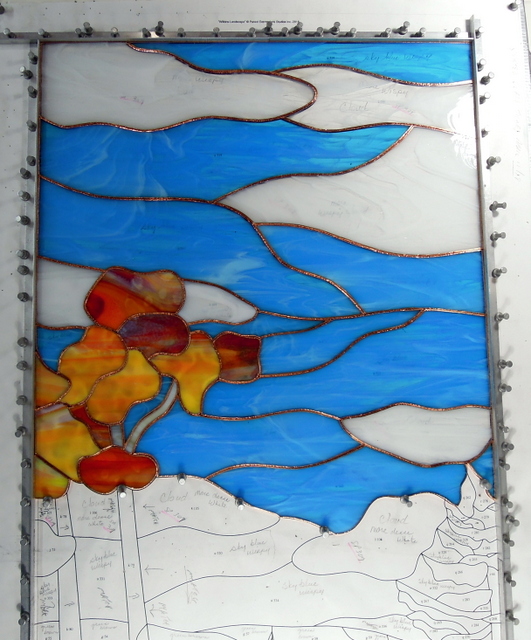
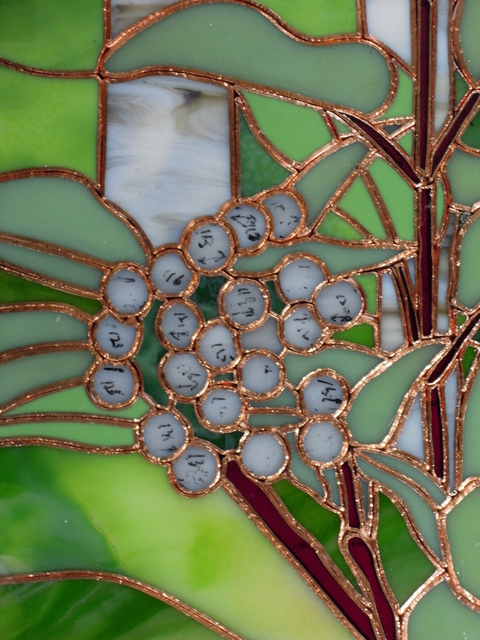
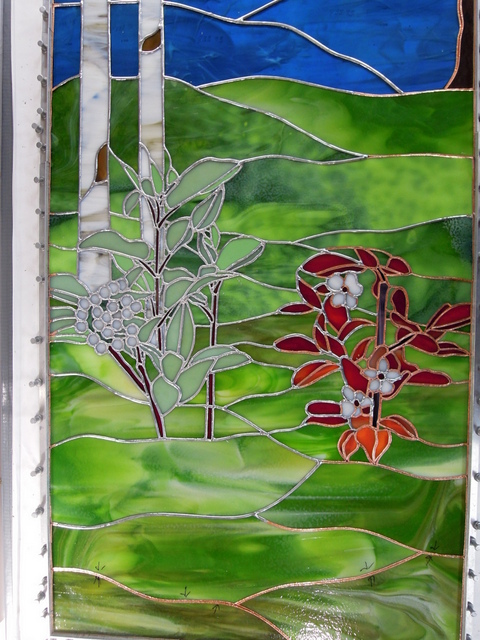
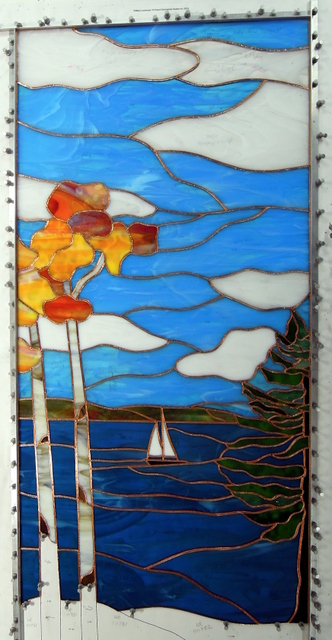
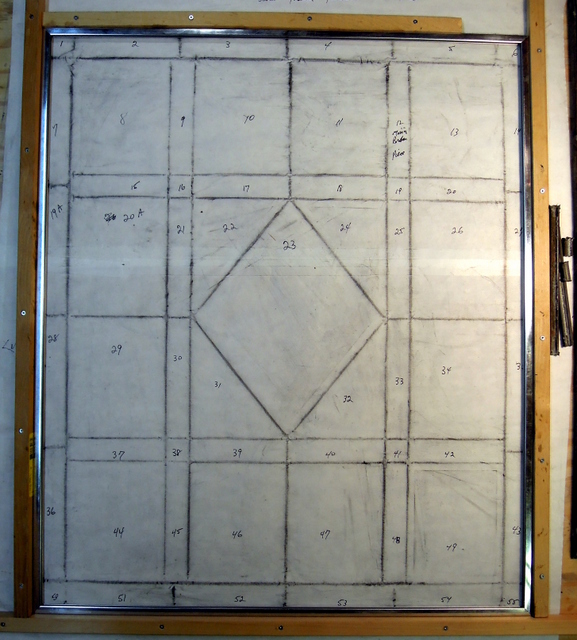
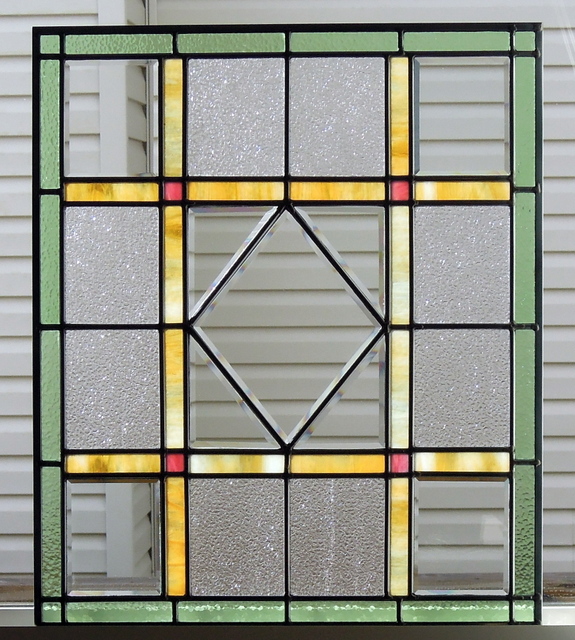
Subsequent to this the museum had donors that were very interested in putting 4 more new stained glass windows in the church once it was restored at the museum site. The donors gave us their ideas and we proceeded from there.

After the church was safely moved onto a new basement, lots of interior and exterior work was required, including all new windows.

It took many months and many trips from our studio here in Innisfail to Red Deer, to do all of this with the last new window just completed and installed in October 2023.

Stay tuned for the existing window restorations and the designs and construction of the 4 new windows.


Information Update re: Old Came Window Restoration 2022

Our client has now installed the restored window into a very old building that she has turned into a wonderful workshop and studio. The location is NE of Halkirk, Alberta and her company’s name is Woolgathering.

Congratulations to Carmen, who persevered to take an old run down building and turn it into a very warm and welcoming studio for her business.

Here are 3 pictures, one of the building as was, then the redone interior along with the restored came window now installed back into the 1910 building.


Door & Transom Windows 2021

A few years ago our clients lived in Southern Alberta and were selling their home, with the intent to build a new craftsman style home west of Rocky Mtn. House. They had designed the sidelight and door panels and commissioned us to build them which they would eventually install in their new handmade front door.

Unfortunately due to the effects of the virus COVID-19, substantial time delays were encountered and it took approximately 3 years for this commission to be completed and to be finally installed in their new home front door.

The five panels were constructed using zinc H round came edged with a flat Zinc border came. The glass used varied from English Muffle’s, Oceanside/Spectrum’s, Kokomo’s along with strategically placed 1 inch square bevels.

The first picture shows this very beautiful handmade door from inside their home.

The second picture below shows the panels with daylight coming through them.

The last photo is the outside view of this very elegant front door.

Stained glass panels designed by our clients and fabricated by Bob & Flory Wilkins

Sylvan Lake Landscape 2019

This wonderful door insert began with humble beginnings as our client initially had made a rough sketch on a piece of paper (see second picture below for the drawing). We then made several trips to our clients home on the shores of beautiful Sylvan Lake located in Central Alberta west of the city of Red Deer.

Once again we enlisted Martha Hanson and her design team at Paned Expression Studios Inc in Edgewood Maryland USA for their stained glass design expertise.

The door insert is approximately 20 inches wide by 63 inches high and comprised of some 400 pieces of stained glass.

This is how this window was first conceptualized by our client.

After visits and further discussions our client enhanced his ideas in more detail.

Shown here is the Fall view of Sylvan Lake from our clients property.  The jut out on the left center is called 3rd point.

This is the view from the door going out onto our clients deck and where the stained glass insert was made for.

This next photo shows a window view of the various birch/popular trees on the property.

On the property were Red Osrser Dogwood and Purple Leaf Sand Cherry bushes, together with birch and evergreen trees all of which our client wanted incorporated into the stained glass panel.

View of one of the many evergreen trees on the property.

Our clients are excellent purveyors of art and from this original painting came up with the basic idea for their stained glass door insert.

The following picture shows the design pattern on which we constructed this panel. We used Spectrum, Uroboros, Bullseye, Kokomo, Wissmach and Youghiogheny glass in the panel.  Here is an interesting fact it required over 208 feet of black backed copper foil.

We started at the top of the panel and worked our way down to the bottom. We use the Morton Layout block system and one has to make sure to measure corner to corner diagonally to ensure squareness of the panel in order for it to fit properly.

The next series of photos are some closeup pictures of the panel construction using the copper foil method. One has to be very careful all the time to ensure the correct flow of the glass.

Next photo shows some of the soldering using 60/40 solder.


Designed by Paned Expression Studios

100+ Year Old Door Panel Restoration

This old came stained glass door panel had reached the point where if it was not removed from the door it was in great jeopardy of collapsing and being ruined forever. As you can see in the picture below, the frame was coming apart. While not visible when you pushed slightly on the center, the whole panel moved in and out a lot and would completely fall apart if the door was slammed or someone pushed on the panel to open the door. Only 1 piece of glass was missing (the amber piece on the top right) while the rest was all in its original state. When restoring these old came panels we securely fasten a sheet of white freezer paper over the whole panel, then using carbon paper we do a rub to have a pattern for restoration.

The panel measured 22 inches wide by 26 1/16 inches high including it’s 3/8 inch zinc frame. The process involves carefully removing the panel and transporting it to our studio. In the restoration process we take multiple photographs and number each glass piece. The challenge in this restoration was the very wide came originally used and not replaceable. The reason for the wide came was for the bevels which were made from very thick glass.

This presented a problem for restoration as we needed to use H Round Zinc Came 1/4 inch face to ensure a strong interior strength coupled with 3/8 Zinc Border Came. We solved this problem by using a standard grit Aanraku Ripple Bit. This allowed us to grind down each side of these very thick bevels so they could be inserted into the new round zinc came. However it was imperative that we grind each side equally so we practised on a bevel that we had in stock. Then through trial and error we set up the ripple bit to ensure removal of the same amount of glass from each side of the bevel before  inserting them into the panel.

The following photo shows a portion of the panel with all of its pieces numbered, we then carefully took the panel all apart and that is when we found out how very thick the glass was in these old bevels.

In the next photo we have now taken the rub pattern and set up a wooden frame, complete with the 3/8 zinc border came, ensuring that we have the measurements exactly so it will fit back into the original wooden door which our client was getting restored. Please note on the right side there are a couple of pieces of the very old came originally used.

The last photo is of the completely restored panel. Fortunately we had a piece of old glass that matched the one broken piece in the panel. We cleaned each piece of glass, carefully measuring and cutting the H zinc came. After soldering the joints we use Glass Pro Stained Glass Putty to cement the glass and then cleaned with whiting, after which we applied Clarity Polish. In this particular case we did not patina any of the zinc came as we felt it was not required in this restoration.

Designer Unknown – Restoration by Bob & Flory Wilkins

Page 2 of 8«123456»...Last »