About windows


Website:
windows has written 397 articles so far, you can find them below.


East Coast Bud Transom Window 2018

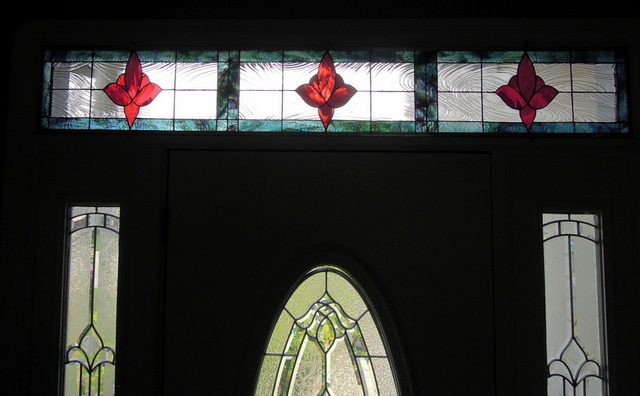
For one of our sons and family we made this transom window. It measured some 66 inches wide by 10 inches high. It was recently installed over their front door in Leduc Alberta.

We incorporated the East Coast Bud design from our Glass Eye 2000 stained glass computer program from the initial design by Jan Williams. This was a Victorian Panel design Circa 1837 -1901 originating on the East Coast of the USA.

For the border glass we used Youghiogheny 900DSR a Dark Blue Waterglass. This is a beautiful art glass however for the inexperienced stained glass artist it can be difficult to cut as well as foil but the end result is well worth the effort. The East Coast Buds were made from Bullseye 2311-30 a Cranberry Pink & White Double Rolled.

The clear glass was Spectrum’s SP – 100B Barnwood, which we were able to procure prior to their selling of their business to Oceanside Glasstile in Carlsbad California. Fortunately we were able to match the barnwood across each section of the 3 Buds and the way it ended up the panels blended extremely well together across the full width of the design.

The first photo is taken from inside the home and one can see how the Barnwood glass matched across the window.

The next photo was taken from the outside of the home.

The next photo shows the transom above the main entrance beveled door and it’s beveled side panels.
After printing off the design from our Glass Eye 2000 program we bordered the pattern using the Morton Layout Blocks system. We had to make sure that all of our measurements were exact and would fit the inside of the window frame. As well we used In-bedded strengthening braid to ensure panel strength and longevity.
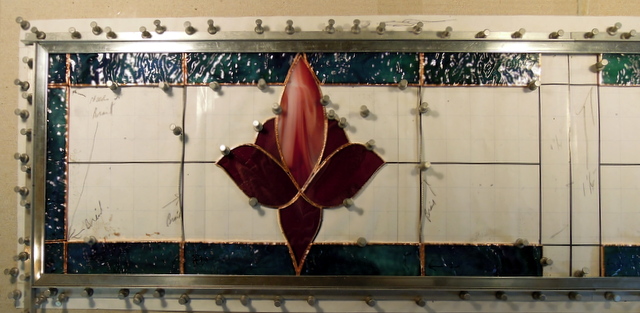
The following photo shows the panel all ready for soldering. Once soldered we use Kwik Clean to remove solder flux. Then we cleaned the solder seams with #0000 Steel Wool applied Jax Pewter Black Patina, then cleaned the panel again with Kwik Clean. Finally we apply Clarity Stained Glass Polish and once dry use soft clothes and tooth brushes to clean and polish the panel and it’s solder seams.

Adaptation East Coast Bud design by Jan Williams

from Glass Eye 2000 computer program by Flory & Bob Wilkins
 

Sewing Machine Panel Summer 2018

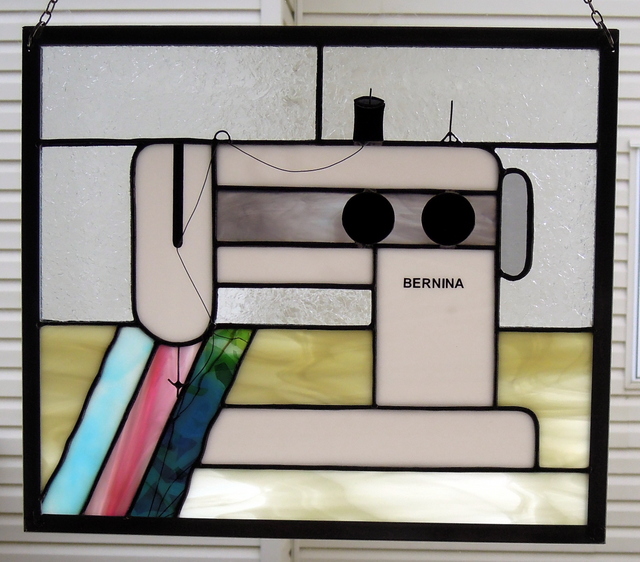
Our client’s wife is a long time quilter and for her birthday he wanted to give her a stained glass sewing machine panel. The panel measured 12 inches high by 14 inches wide. The spool of thread alongwith the 2 round black dials were overlaid on the panel. We also used overlaid wire for the thread and needle.

We used strips of colored glass to represent quilting material. Her sewing machine was a Bernina and we added the name in black lettering as a final touch.

Design by Flory Wilkins

Spruce Up Your Garden Spring 2018

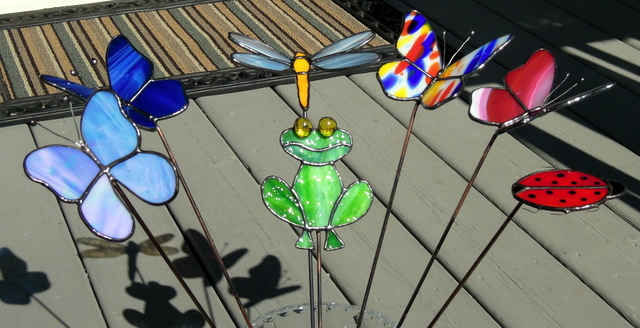
Winter still grips Western Canada but spring will eventually arrive, so now is the time for you to plan  and obtain wonderful items to compliment your outdoors especially those deck flower pots. Our Garden Butterflies, Frogs, Ladybugs and Dragonflies will certainly brighten your flower beds, gardens, flower pots and add that special touch of beauty to your home.

We use very beautiful art glass for these items, including Youghiogheny, Armstrong, Kokomo, Uroboros, Wissmach, Spectrum and Bullseye, some of this glass is Iridescent which adds that extra touch of beauty.

Designs by Flory and Bob Wilkins

Zebra Panel Christmas 2017

This Zebra panel was commissioned for Christmas 2017 and measured 10 inches wide x 14 inches high. We fortunately still had some Spectrum Baroque #BR 6000 – Black/White/Clear for the 4 corners and for the rest of the frame we had a discontinued piece of Spectrum #4000-9SF Black/Clear.

We used Spectrum #1009W Black Waterglass for the Zebra’s black lines and Spectrum #200CC Corsica Pot White Opal for the white portions. For the nose and ears we used Bullseye Charcoal Grey  Double Rolled #1129.

The background glass was Spectrum #823.92 Teal Green Swirled with White Wispy. The frame is 3/8 inch zinc came, drilled very carefully with key chain rings inserted for the hanging chain,

When making panels we use the Morton Layout Block System and we use a metal square to ensure that the panel is square, as well as making sure corner to corner measurements are exactly the same.

Original Design by Chantal Pare with some slight modifications by Flory Wilkins


Loon Panel Restoration 2017

A client from Rimbey Alberta brought us this panel which if memory serves us correctly had been knocked off the window by her cat. When doing restorations like this we first do a rub by laying over the panel a taped down piece of white freezer paper. We then take carbon copy paper and rub the entire panel which traces the solder lines to the paper and that paper then serves as a guide to rebuild and restore the panel.

This panel was originally made by our clients daughter and we wanted to save as much as possible of her work when restoring this stained glass loon panel.

Then we removed the frame and proceeded to remove the necessary pieces of broken and other glass. In this case we worked from the bottom up and did not proceed beyond the dark blue glass below the brown colored glass as all from there to the top of the panel was still intact.

Fortunately we had matching replacement Spectrum Glass to replace the broken pieces.

The next photo shows the rebuilding process. We had to use quite a lot of new glass in the lower half due to the breakage and to restore proper fitting of the pieces.

When one does this without taking the whole panel apart, it is necessary to first solder together all of the new pieces, then placing some thin clear glass under the restored part in order to bring it up to the same level as the original top portion of the panel. This is required to ensure that new pieces connect properly at the same level. At the request of our client we changed the loon eye to red.

We also installed a 1/2 inch new zinc came frame around the panel.

After soldering we clean the flux off with Kwik Clean, take steel wool (#0000 – which does not scratch glass) to the solder seams. Then apply black patina, again cleaning with Kwik Clean and finally applying Clarity (Kem Pro) stained glass polish.