125+ Year Old Came Window Redesign and Restoration

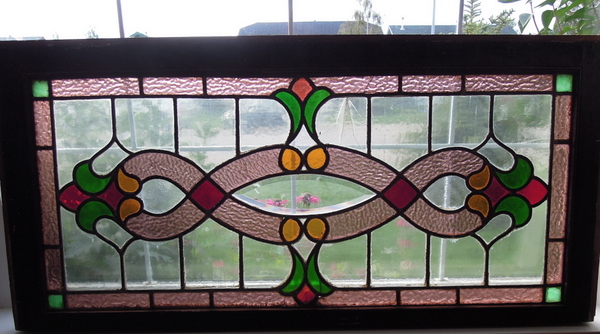
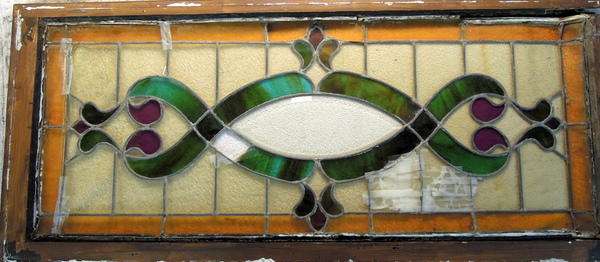
For many years this very old came window rested secured under a bed. It measured 16 inches high by 40 inches wide. Was in poor structural condition as well had numerous lightly colored broken border pieces.

Our clients had just built a new home in a smaller Central Alberta community and wanted to have it restored to go into their new transom window above their front door entrance. But the new transom window measured 12 inches high by 49 inches wide, so we had to redesign the window to those measurements, as well as come up with a design that would use the existing glass.

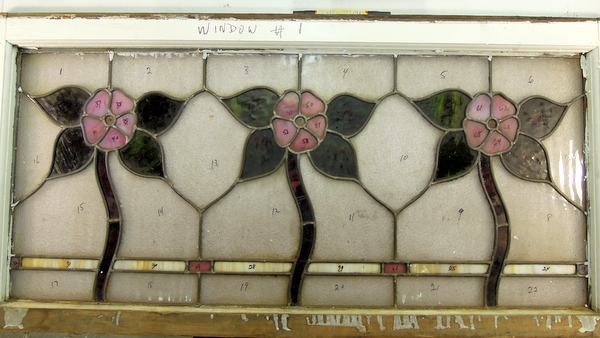
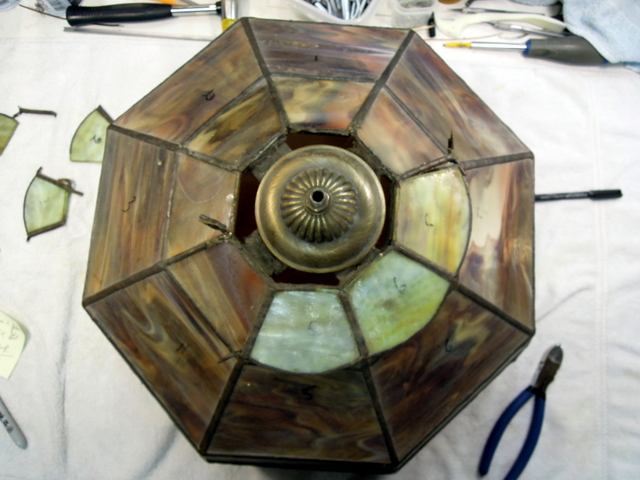
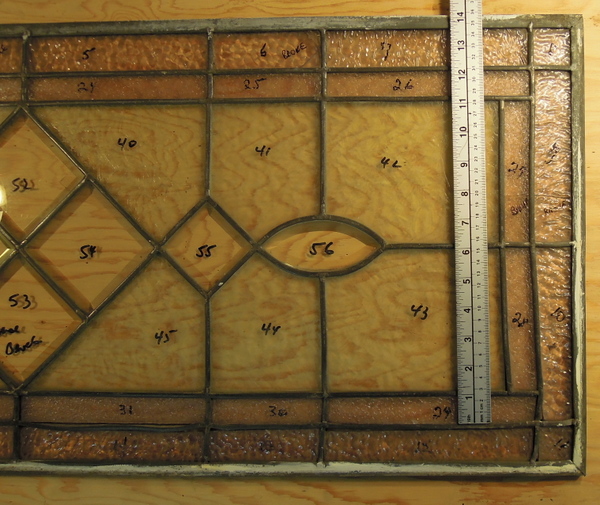
The following picture shows the window in it’s original condition.

CameWindowRestorationRedesign2014

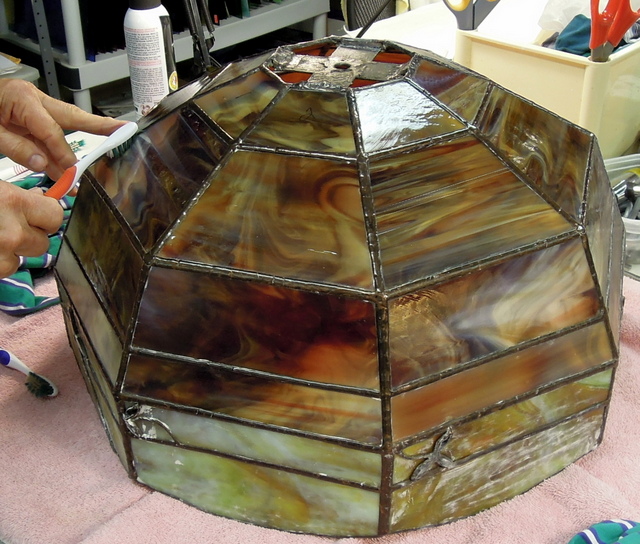
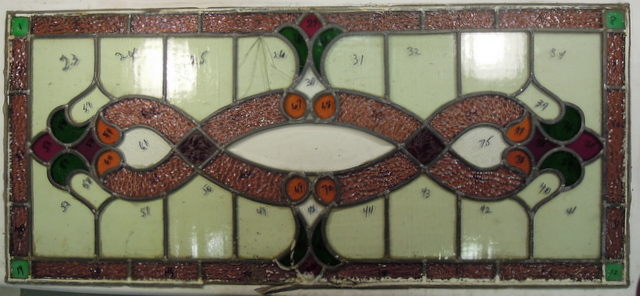
Before we start a came restoration and after taking the initial photo we then number each piece and photograph the window again.

Then we proceed to carefully cut away the rotten came and sort each piece by color etc and place them in separate boxes – beer flats and smaller soup can cardboard flats work well as it provides lots of room to spread out the various varieties of glass.

We used to clean each piece and renumber but found that was more time consuming than just cleaning each piece when we are ready to use it in the reconstruction process.

StainedGlassCameWindow2014

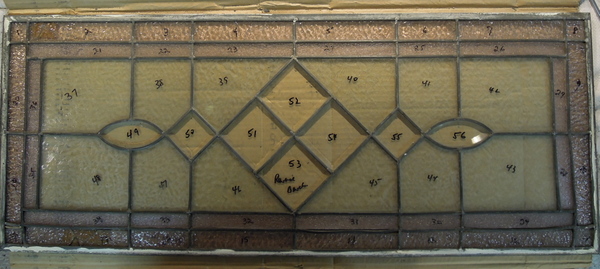
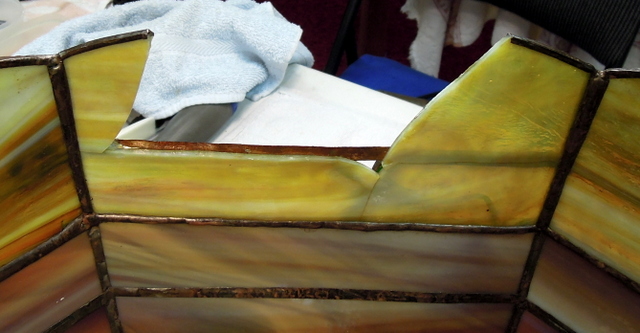
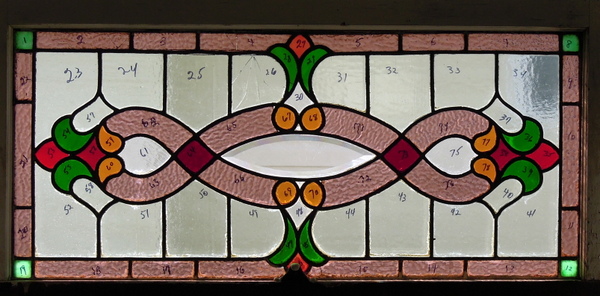
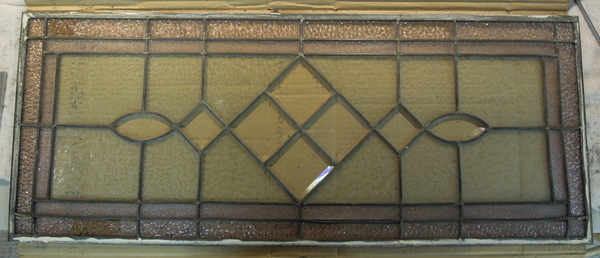
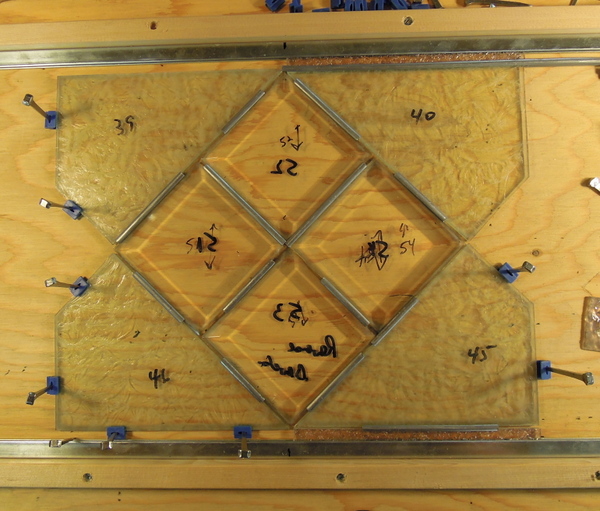
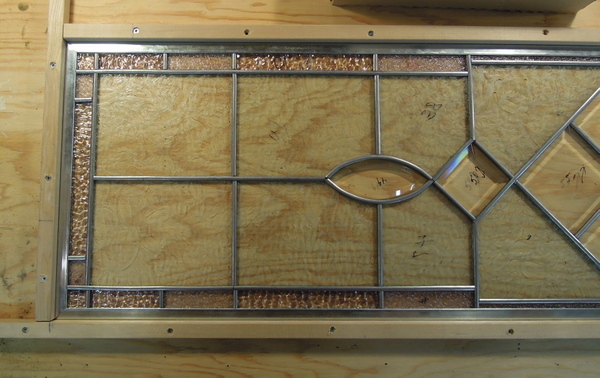
The next 2 pictures can give you an idea as to how much we had to stretch the length from 40 inches to 49 inches as well as shrink the height from 16 inches to 12 inches.

These measurements also included the new 1/2 inch came frame. We use a piece of 3/4 inch plywood for the base and make the frame from hickory hardwood with intermittently placed drill holes, then using  fine wood screws we attached these frames to the plywood base.

CameWindowMeasuring

You can see that we had to be creative to figure out how we would have enough of the colored border glass to go around.

CameWindowMeasuring#2

After numerous measurements to ensure final fitting accuracy, we built the wooden frame, miter cut the 1/2 zinc came frame and started the rebuilding process.

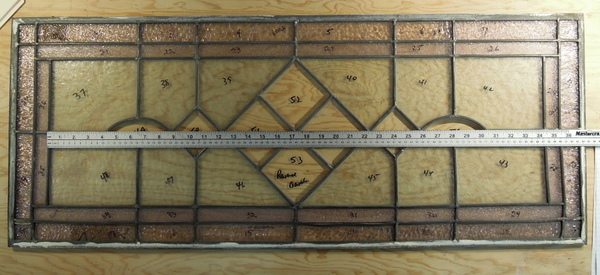
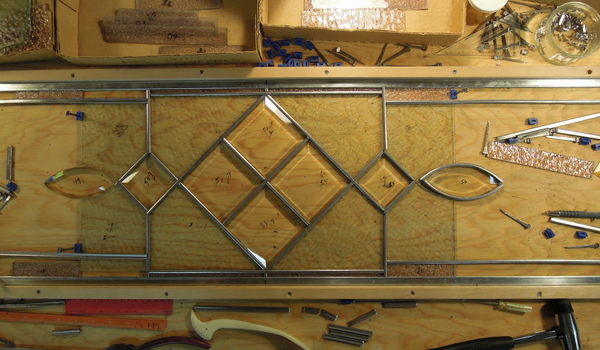
The following picture shows the start of the redesign process.

OldCameWindowRebuild

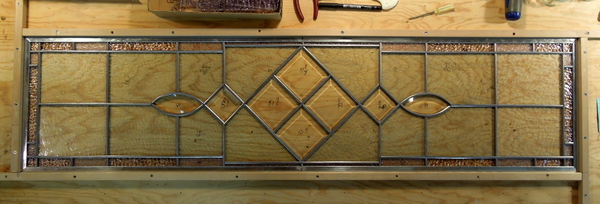
In the next photo we have expanded the left and right sides of the center bevel cluster, along with enlarging the colored border.

OldCameWindowRebuild#2


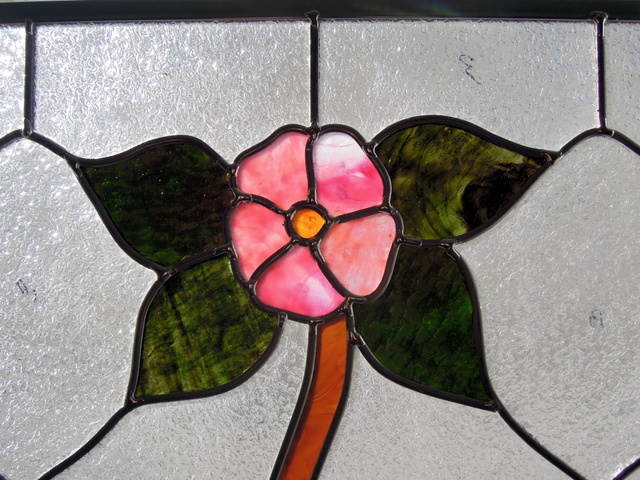
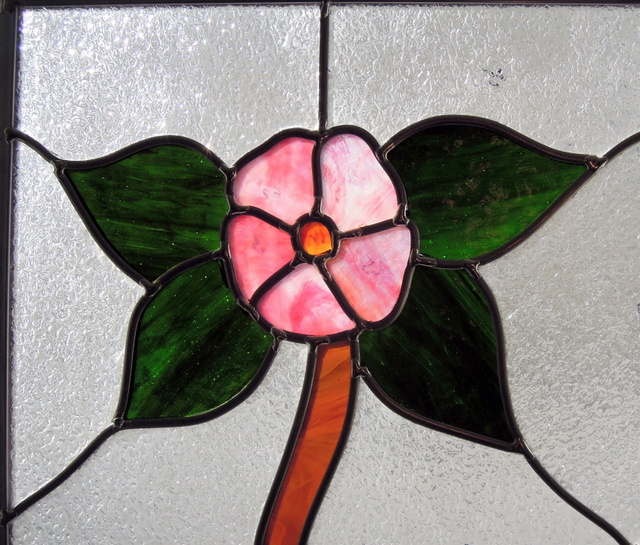
The following 2 photos show the completed redesign first the right side and then the left side.

RightSideOldCameWindowRebuild


LeftSideOldCameWindowRebuild

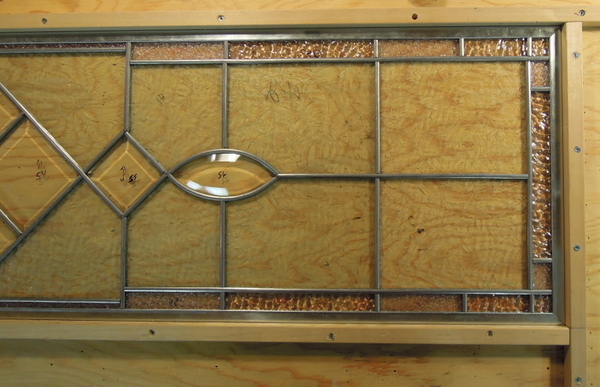
In the next photo the redesigned window is ready for joint soldering, cementing, whiting, then patina and polish.

StainedGlassCameWindowAugust2014

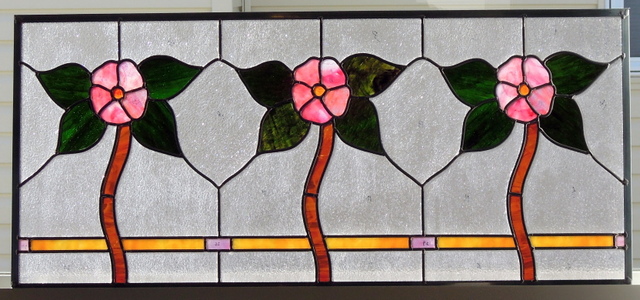
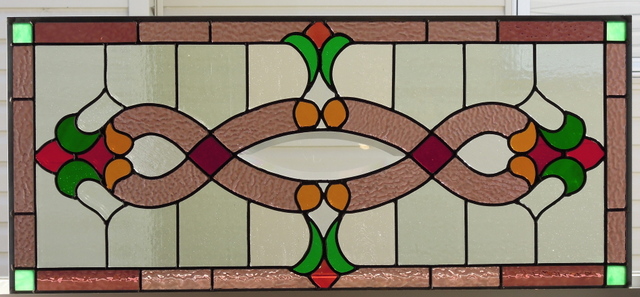
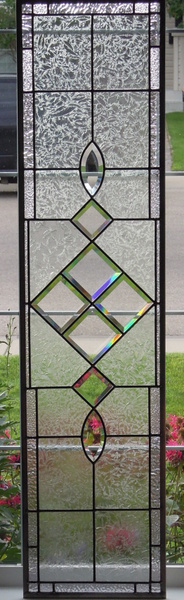
In the next picture the window is finished and ready to be taken to our clients. After soldering the came joints (cleaning the flux with Kwik Clean), cementing, cleaning with whiting, applying black patina to the came, cleaning again with Kwik Clean and applying polish, followed by lots of further cleaning, polishing with soft rags, along with using tooth brushes and X-acto knives to pick away any missed cement etc. we then have a beautiful window ready for our clients.

StainedGlassCameWindowCompleted2014

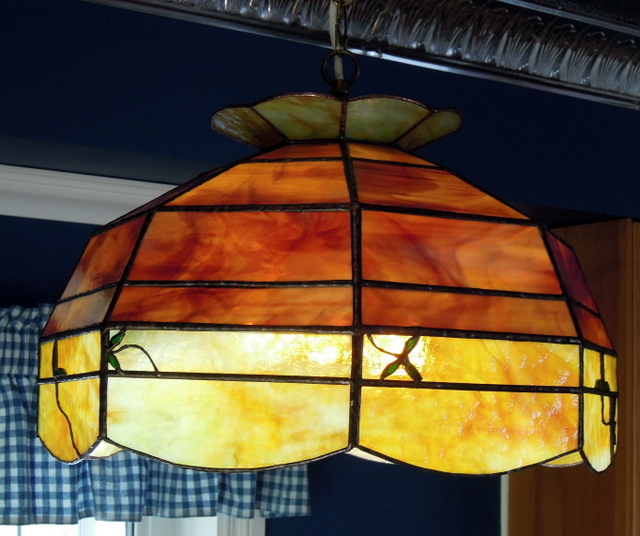
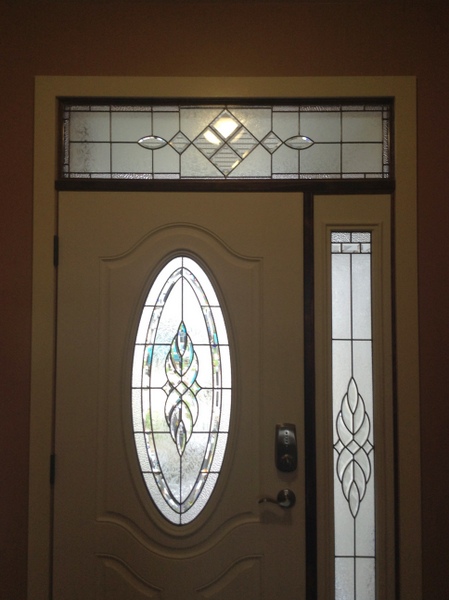
Here is the window installed in it’s new home location. Our clients were more than pleased with the results and how it fitted into the new transom window opening along with how it complimented the new door and sidelight beveled panels.

Stained GlassCame Window 2nd 2014-001

Redesign/Reconstruction by Bob & Flory Wilkins


Lamp Repair – Restoration July 2014

A picture story of a broken Stained Glass Lamp Shade. The picture below shows the damage to the lamp’s crown.

StainedGlassLampBrokenCrownJuly 2014

The next photo shows the one large lamp panel with serious cracks in it.

StainedGlassLampBrokenPanelJuly2014

This last photo shows the broken bottom panel. There were 4 crown pieces, 1 large panel and 1 bottom panel which were broke.

StainedGlassLampBrokenBottomPanelJuly2014

When we take out broken lamp pieces we use a large low sided box filled with crumpled newspaper for support of the lamp shade, then slowly and carefully remove the broken panel. What helps in this process is to take steel wool #0000 only to clean the old solder seams of their dirt and patina, as it allows faster melting of the old solder and less chance for heat build up to damage other pieces.

StainedGlassLampRemovalofBottomBrokenPieceJuly2014

The next photo shows the lamp shade with all of the broken pieces and the crown removed. Then all of the edges need to be thoroughly cleaned and scraped of all of the old foil, using an X-acto knife, #0000 steel wool along with Kwik Clean. Then new foil has to be applied and burnished on to the existing cleaned areas and the new pieces to be used.

StainedGlassLampBrokenPiecesRemovedJuly2014

The next picture shows the crown fully restored.

StainedGlassLampRestoredCrownJuly2014

Once all the new pieces have been properly soldered in place, with beading as required along the edges. In this case we did our best to match the soldering techniques used by whoever made the lamp. Then the completed lamp shade is cleaned with Kwik Clean to remove flux. We then mixed some black and copper patina’s together to match the antique brass look. After that another cleaning with Kwik Clean, then Clarity stained glass polish applied, with final polishing using soft cloths and tooth brushes for the seams. Then double checking when on a lighted lamp stand which allows to see and find polish etc that we may have missed.

StainedGlassLampCompletionJuly2014

 Designer Unknown


Alberta Rose Came Window Restoration # 1

We have now finished the restoration of the 1st of 2 old Alberta Rose Came windows. This first one has a rose/pinkish granite background glass. Fortunately none of the background glass was broken however we did have to use some the green leaves, stems and amber border from the 2nd window, which allowed us to make one complete window with all original glass. This window was delivered to our client in Stettler Alberta a few days ago. He was most impressed and eventually we will be given photos of where he intends on placing it in his home.

AlbertaRoseCameWindowRestored2014

The second picture below shows of just how much the granite background glass glistens in sunlight as the sun’s rays change during the day.

AlbertaRoseCameWindowSunlight2014

To view more of the construction details about this Alberta Rose window follow this link on our website

http://windowsofthewest.ca/2013/04/17/alberta-rose-came-window-restorations/

We love to do these restorations of very old came windows but they are an intense labour of love on our part, requiring many hours of reconstruction from photographing, numbering of each piece of glass, then lots of cleaning of those pieces of glass to remove decades of dirt, paint and grime, then restoring them in new came, soldering, cementing, cleaning and polishing. These windows that have lots of this granite glass takes many hours of intense cleaning with various brushes, X-ACTO knife blades, polishing cloth’s etc. but the finished restoration gives our clients and ourselves a great deal of  pride and satisfaction.


Very Old Came Window Restorations

For the past few years we have been working on and still restoring more of these old came windows. We just wanted to give you a hint of what we have been doing with these old came window reconstructions, and down the road we will have  lots of pictures and their unique stories. Some of these windows are over 100 years old and the pictures below show the windows before being restored.

100+YearOldWindow

 Window # 1

Stained Glass 2010 263-001

 Window # 2

LavonaWindow

 Window # 3


Tiffany Lamp Repair March 2014

In early March we were brought from Calgary 2 Tiffany Style Lamp shades for repair. One of the shades vase cape as you can see in the first 2 pictures had pulled away from the lamp. This unfortunately was due to poor attachment of the vase cap to the lamp shade.


We had to fully remove this vase cap smooth out all of the solder joints, along with cleaning the cap and joints with steel wool. Always remember when using steel wool the only # that you can use and won’t scratch any glass is #0000. Then we re-soldered the vase cap not only to the outside lamp solder seams but also to all of the inside solder seams and to the top rim of the lamp shade.

Then we use Kwik Clean to remove any flux using tooth brushes and compressed air to ensure all of the Kwik Clean has been removed and the repair soldering is clean & dry. Once that is done we applyed new black patina where required, clean again with Kwik Clean.

Once we were satisfied with the repairs we then applied Kem Pro polish to both lamp shades inside and out. The other lamp shades vase cap was attached ok but we applied additional solder connections on the inside and of course cleaned the flux off, applied black patina, re-cleaned and then applied Kem Pro polish.  We then use soft cloths along with toothbrushes to ensure that each piece of stained glass in lamp shade is cleaned and brought to a luster shine. This takes some time due to the many pieces of stained glass in each shade and also both the inside and outside of the shades had polish applied.

The final picture shows one of the shades after being polished and ready to be returned to our clients who live in Calgary.

StainedGlassTiffanyStyleLampRepaired2014


StainedGlassTiffanyStyleRepaired2014

These Tiffany Style Lamp Shades Designed and Made in China

Page 4 of 6«123456»