The Burroughes Family Crest Circa 1895 – 1906

Back in 2017 we were asked if we could restore this very old family crest – refer “110+ Year Old Family Crest Restoration” published on our Windows of the West Stained Glass website last October 23, 2018.

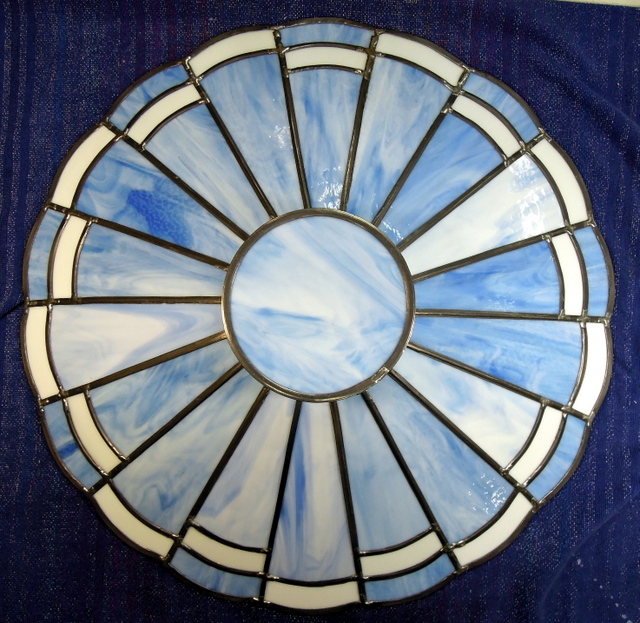
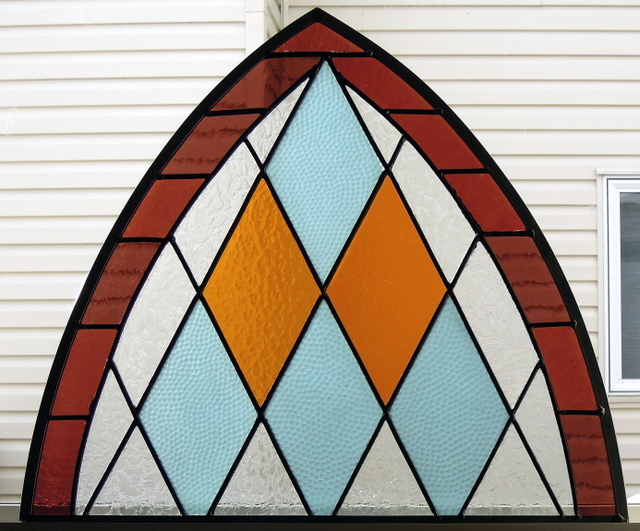
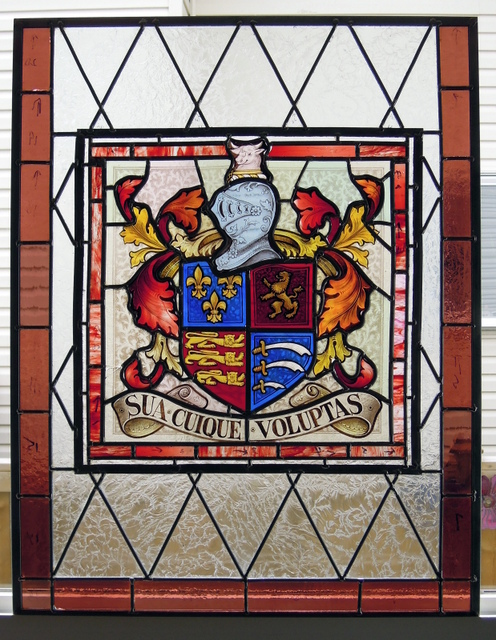
The following picture is of the completed Crest. There were 2 panels – the bottom one measured 23 1/2 inches wide by 30 inches high and top panel was 21 1/2 inches high. Combined the 2 panels were over 50 inches in height not counting the custom made laminated maple wooden frame.

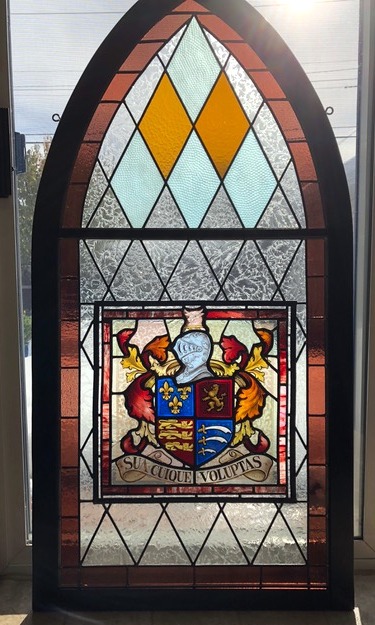
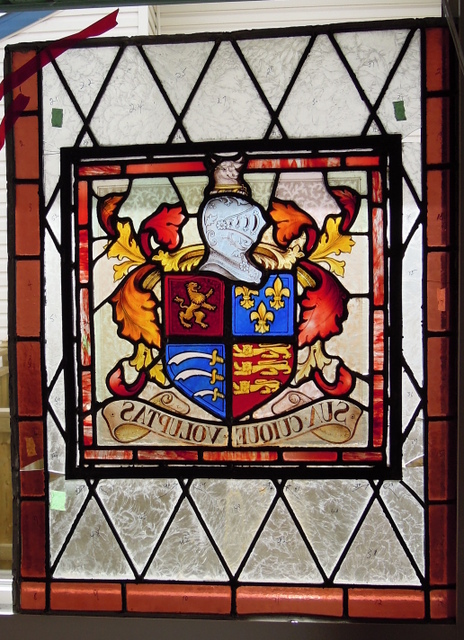
Please note the Latin wording on the crest “Sua Cuique Voluptas” which has the meaning of “Everyone has his own pleasures” or “to teach his own pleasure”

The History of Henry John Frank Burroughes as provided by the Burroughes family members.

Henry John Frank Burroughes was born in 1864 in the Parish of Kentish Town, (now part of London England) in the County of Middlesex, England.

He was the eldest child of John & Jane Burroughes. At the age of 13 he was apprenticed to a firm of Stained-Glass Window makers, where he received the sum of 2/6 (shillings/pence) per week, rising to the sum of 15/- at 19. I believe that at the age of 21 he then earned 2 English Pounds (quid as it was commonly called) per week and his salary remained at that figure until 1914. The outbreak of the Great War caused the firm to close, as there was a declining popularity for stained-glass, and by then it was considered a luxury trade.

Times were very hard in those days, and if the firm had no orders in hand the men were just laid off with no pay. This was a great injustice as he was a skilled craftsman. Henry’s father was killed by a runaway horse, so being the eldest son he had to contribute money to his mother, until she died at 88.

The stained glass family crest was made by Henry John Frank Burroughes in England in 1906. It was in the Burroughes family England home for many years, until it came to Canada in the 1940’s. Then approximately around 1948 it was gifted to Lakefield Boys school – details are sketchy but outlined in the next paragraph is information that was provided by a volunteer who worked in the archives of the Lakefield College School, Lakefield Ontario.

“There is a new window in the east wall of the link between the dining-room and New Wing. It is a stained glass window and was donated by Mr. F.E. Burroughes the father of Grant. It is the work of Grant’s grandfather (Henry John Frank Burroughes) who enjoyed a reputation in England and Europe for his skill as a stained glass artist.”

Current History 

We understand from our clients that eventually that wing of the Lakefield College School was going to be torn down and the family was asked if they would come and retrieve the stained glass family crest if they wanted it and that is what they did.

Our clients brought the stained glass window out west to Vancouver in 1993. They had a stained glass artist friend who thought they could restore it in the 90’s. That never happened. Eventually the stained glass window was picked up in 2004 and remained in Sylvan Lake until 2017.

In 2017, our clients brought it to our studio and we said we were quite willing to tackle the restoration of this historic piece of family stained glass.

Henry John Frank Burroughes was our clients great grandfather.

We and our clients mused that this was an opportunity to restore the family crest. “De.ja vu” is that Bob Wilkins was born in London, Ontario in the County of Middlesex.

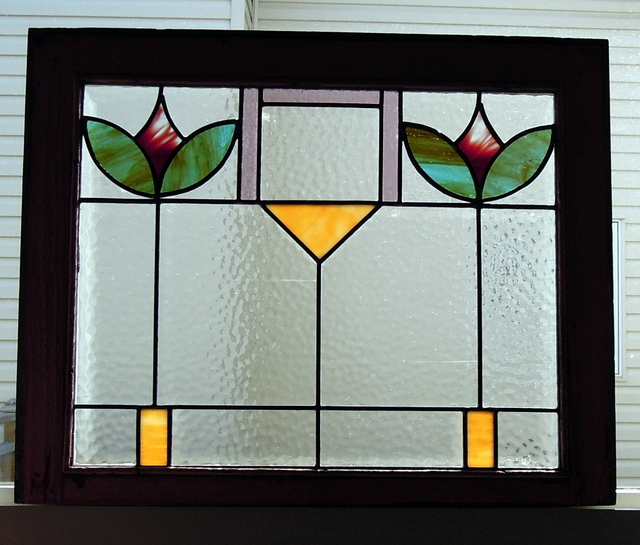
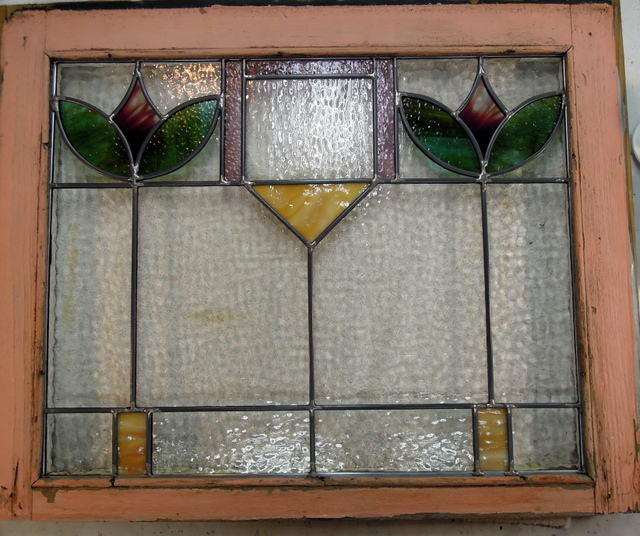
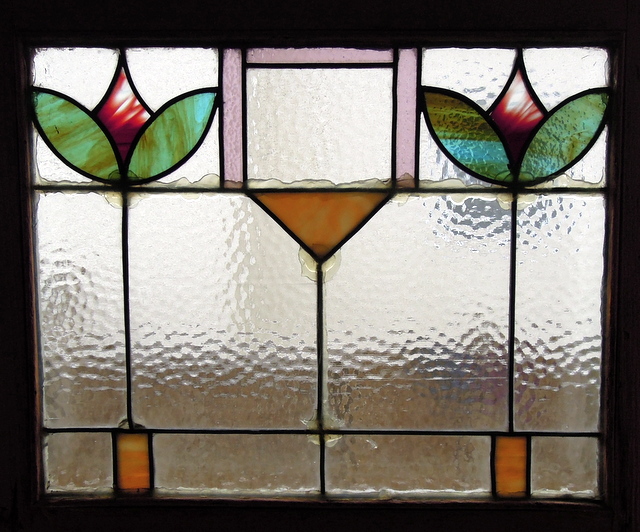
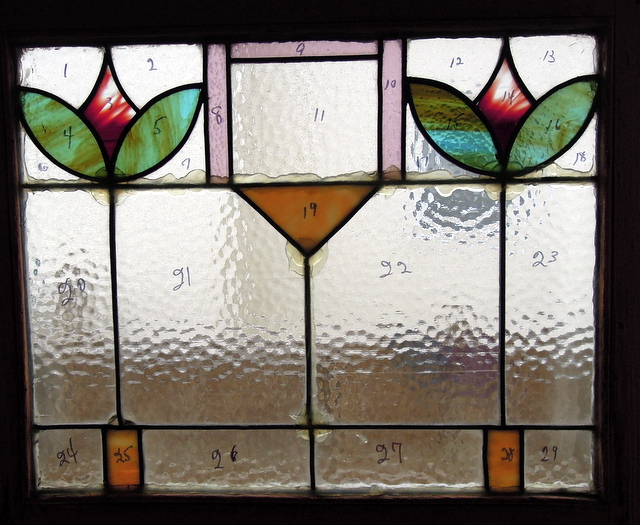
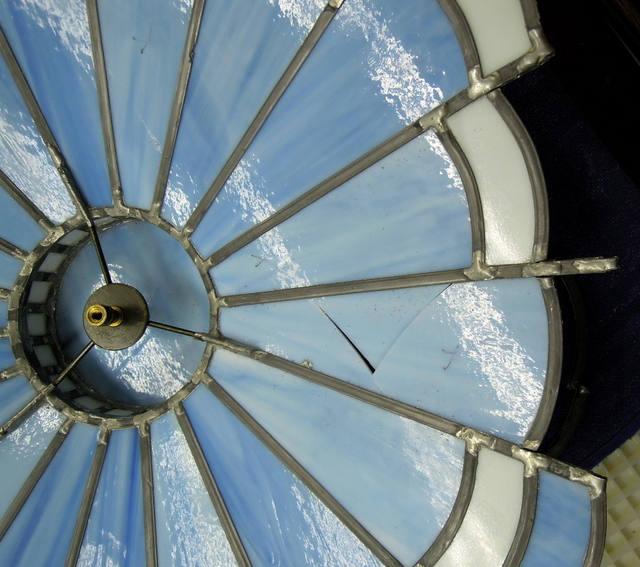
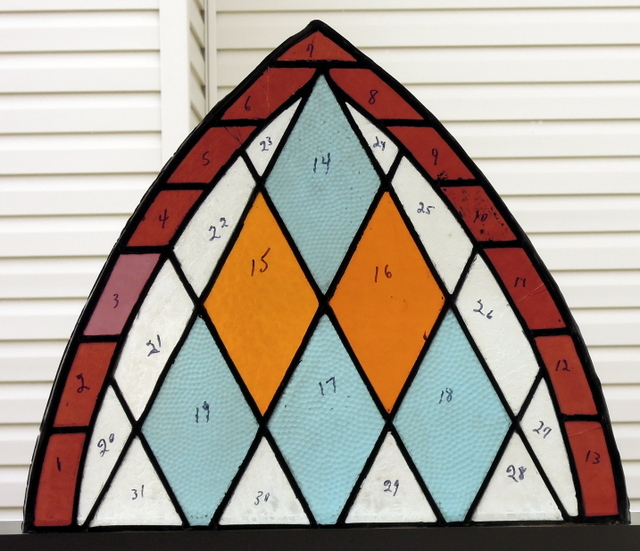
The following photos of the crest show it’s condition when we received it and we started with restoring the top portion first.

We number each piece and photographed the panel. Panel #’s 5,6,11,13 were all broken and at some point in time # 3 was replaced with that color hue piece. We were lucky to find a piece of Light Rose Brown glass manufactured in Poland many years ago. It have very similar color and hue but not quite the same texture but was as close to the original as we could find.

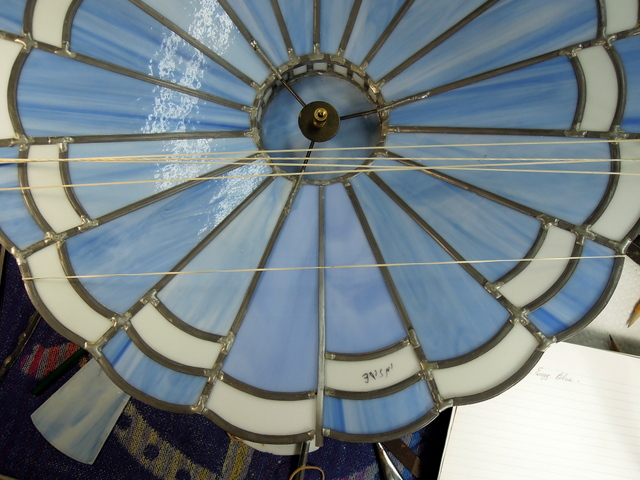
The panel was then completely taken apart and rebuilt from the bottom up, using the broken pieces etc as patterns for the new glass where necessary.

Each piece of glass was scrubbed clean using warm soapy water. #0000 steel wool where necessary, along with Mother’s Choice Natural Hard Surface Cleaner which is made from fine pumice and does an exceptional job in cleaning stained glass that has been exposed to the elements for decades.

The next photo shows the panel ready for soldering of the joints and the new 1/2 inch zinc came frame

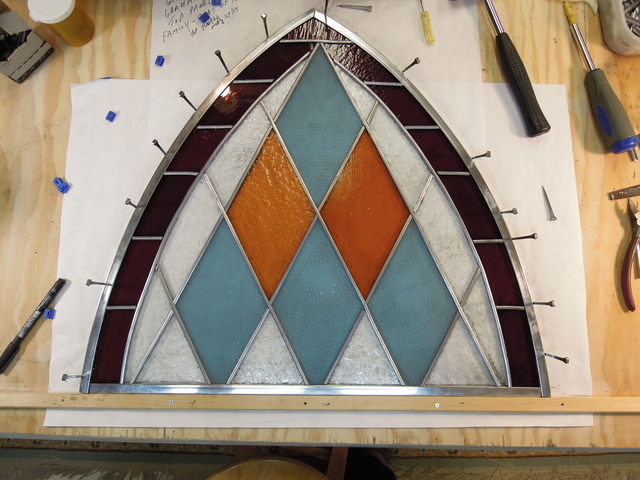
After soldering of the joints, cementing the lead came, cleaning with whiting, allowing time for the cement to cure and harden, we then cleaned the came with #0000 steel wool (Any higher rated steel wool will scratch the glass) applied black patina. The panel was then cleaned with Kwik Clean and once dry we applied Clarity (Kemo-Pro) stained glass polish, buffing with soft cloths, along with using toothbrushes to get at all the polish residue especially around joints and very necessary when polishing glue chip and rougher glass surfaces.

The bottom portion being the Burroughes Family Crest was in very poor condition, with many broken pieces along with some of the fired crest pieces being cracked. Besides replacing the broken border pieces we redesigned the four corner pieces of the crest where all of the glue chip was broken, so as to prevent that occurring again in the future. Between the reddish interior border and the larger lead came frame, the majority of the clear glass was broken and we decided to replace all with an old Kokomo #33 GCP made in 1991.

We also had to match similar reddish border glass surrounding the outside of the crest.

Due to the age and the unknowns that we might encounter with this restoration we soaked the crest in a kids wading pool for quite some time to soften the old came and cement making it much easier to take apart. We were very glad we did as there were some cracked pieces. Also there were numerous thickness of the glass used especially the fired top left red piece as it was only 1 mil in thickness, while others were 3 mil and 5 mil.

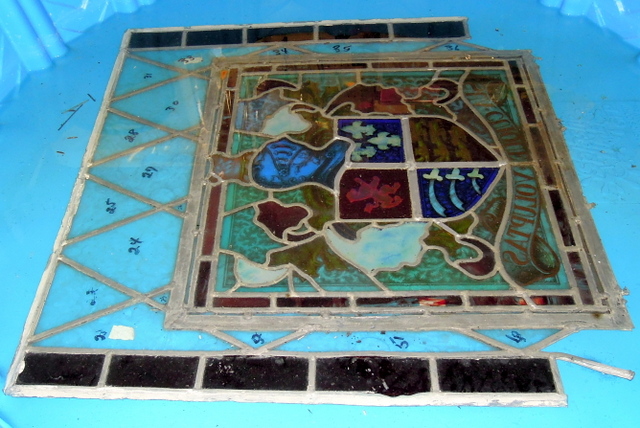
The last picture shows the restored crest before cleaning and polishing. We were most fortunate to be able to call upon the decades of experience in the stained glass business of David & Crosby Haight of Rubaiyat Stained Glass Studio in Calgary, for helping us find old glass replacements. Several of the fired pieces were cracked and they helped us in using a special ultraviolet glue to glue the cracked fired pieces back together. This special glue dries clear and is very strong. The fired pieces of glass in the family crest were irreplaceable and great care was taken to ensure none were lost in the restoration process.

Original by Henry John Frank Burroughes circa 1895-1906

Restoration by Bob & Flory Wilkins 2017-2018

Beveled Northern Lights/Polar Bear Panel 2019

Our clients asked us if we could repair this beveled Polar Bear/Northern Lights panel, which measures approximately 40 inches wide x 14 inches high. Unfortunately the left side of the border came had pulled apart.  Fortunately the panel did not get broken.

We carefully removed that piece of border came and then re-attached it to the panel as well as strengthen all of the solder seams on both sides/corners of the panel that butted up to the came.

The first picture shows the completed repair, after being cleaned with Kwik Clean and Clarity stained glass polish applied.

This is a very pretty panel. Most of the glass used for the northern lights was Spectrums Artiques along with Spectrums white waterglass. The Polar Bear is a Glassmith bevel cluster.

The following photo shows where the left side came had come loose from the panel.

Designer unknown

Polar Bear Bevel Cluster by Glassmith Studios


Repair of 120 + Year Old Panel 2019

Our client found this very old came panel in the attic of his 92 year old father’s shop and he had no idea it was there. The story is that they used to be part of his great (or great-great) grandfather’s home in England.

The panel had held together quite well over the decades except for the 1 broken piece in the center. We were able to find a very close match with a Small Hammered Spectrum # 100HS. On the reverse side we carefully bent the lead came back, made a pattern and fitted in the new glass. Then after bending the came back, we soldered the joints and cemented in the new piece of glass.  After using whiting and Kwik Clean to clean the off years of dirt and grim we applied Clarity Polish.

As this panel with it’s frame was over 4 ft wide we could only stand it up in our window to photograph the finished panel, which then required flipping the picture with our Picasa 3 system.

It is our clients intention to hang this panel in their new home under construction and eventually he will provide us with a picture. We also understand that there is another one these panels completely intact and all it needs is to be properly cleaned and polished.

Designer Unknown Repair/Restoration by Bob & Flory Wilkins

100+ Year Old Door Panel Restoration

This old came stained glass door panel had reached the point where if it was not removed from the door it was in great jeopardy of collapsing and being ruined forever. As you can see in the picture below, the frame was coming apart. While not visible when you pushed slightly on the center, the whole panel moved in and out a lot and would completely fall apart if the door was slammed or someone pushed on the panel to open the door. Only 1 piece of glass was missing (the amber piece on the top right) while the rest was all in its original state. When restoring these old came panels we securely fasten a sheet of white freezer paper over the whole panel, then using carbon paper we do a rub to have a pattern for restoration.

The panel measured 22 inches wide by 26 1/16 inches high including it’s 3/8 inch zinc frame. The process involves carefully removing the panel and transporting it to our studio. In the restoration process we take multiple photographs and number each glass piece. The challenge in this restoration was the very wide came originally used and not replaceable. The reason for the wide came was for the bevels which were made from very thick glass.

This presented a problem for restoration as we needed to use H Round Zinc Came 1/4 inch face to ensure a strong interior strength coupled with 3/8 Zinc Border Came. We solved this problem by using a standard grit Aanraku Ripple Bit. This allowed us to grind down each side of these very thick bevels so they could be inserted into the new round zinc came. However it was imperative that we grind each side equally so we practised on a bevel that we had in stock. Then through trial and error we set up the ripple bit to ensure removal of the same amount of glass from each side of the bevel before  inserting them into the panel.

The following photo shows a portion of the panel with all of its pieces numbered, we then carefully took the panel all apart and that is when we found out how very thick the glass was in these old bevels.

In the next photo we have now taken the rub pattern and set up a wooden frame, complete with the 3/8 zinc border came, ensuring that we have the measurements exactly so it will fit back into the original wooden door which our client was getting restored. Please note on the right side there are a couple of pieces of the very old came originally used.

The last photo is of the completely restored panel. Fortunately we had a piece of old glass that matched the one broken piece in the panel. We cleaned each piece of glass, carefully measuring and cutting the H zinc came. After soldering the joints we use Glass Pro Stained Glass Putty to cement the glass and then cleaned with whiting, after which we applied Clarity Polish. In this particular case we did not patina any of the zinc came as we felt it was not required in this restoration.

Designer Unknown – Restoration by Bob & Flory Wilkins

Mexican Lamp Repair October 2018

Our client’s family obtained this lamp many years ago and in our investigation we found out that it most likely was made in Mexico some 40 – 50+ years ago. The lead came that held all of the individual glass pieces together, was made by rolling flat led through a roller which gave the came it’s teeth marks on both the inside and outside of the came. For that reason we had no way of replacing the came and wanted to make sure that the lamp was as original as possible.

We had to take the loose pieces of glass ( numerous ones had completely fallen out ) and after cleaning each one, we manipulated the came with small tools along with a wooden awl. All of the glass was hand cut and grozend by hand (no grinders in those times), which left lots of chips on the pieces as can be seen in the pictures.

The first photo shows the restored lamp shade.

As you can see in the next photo the came was quite bent out of shape, which allowed the glass pieces to fall out, fortunately our client never lost any of those pieces.

Using our hands and a wooden awl we manipulated the came where the glass pieces had fallen out.  Also on the inside of the shade we re-soldered each joint to further stabilize and strengthen the shade. It was also necessary to apply some solder around the outside at the top of the shade. After cleaning with Kwik Clean to remove flux and dirt, we appling Clarity polish and after it dried we then finished off with lots of rubbing with soft cloths and tooth brushes.

What is neat about this old lampshade with all of it’s open spaces between each piece of glass is that it gives off a colorful collage of colors on the surrounding walls when in use.

Designer Unknown lamp restored by Bob & Flory Wilkins 2018

Page 2 of 10«123456»...Last »