About windows


Website:
windows has written 397 articles so far, you can find them below.


Lamp Repair – Restoration July 2014

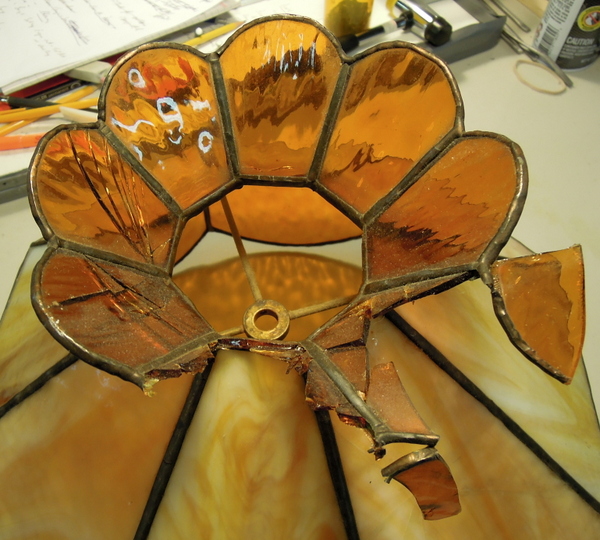
A picture story of a broken Stained Glass Lamp Shade. The picture below shows the damage to the lamp’s crown.

StainedGlassLampBrokenCrownJuly 2014

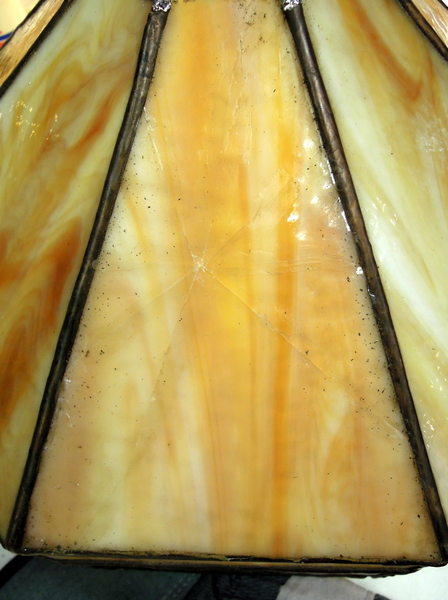
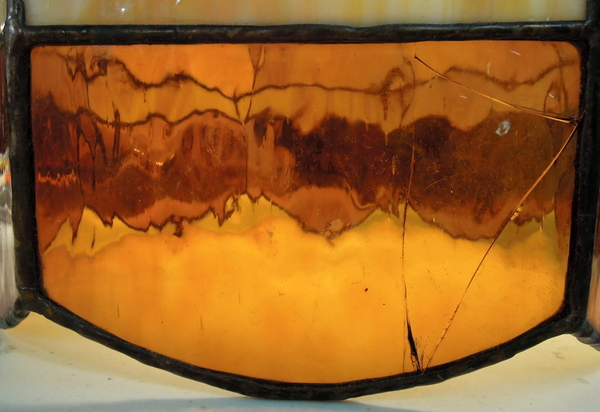
The next photo shows the one large lamp panel with serious cracks in it.

StainedGlassLampBrokenPanelJuly2014

This last photo shows the broken bottom panel. There were 4 crown pieces, 1 large panel and 1 bottom panel which were broke.

StainedGlassLampBrokenBottomPanelJuly2014

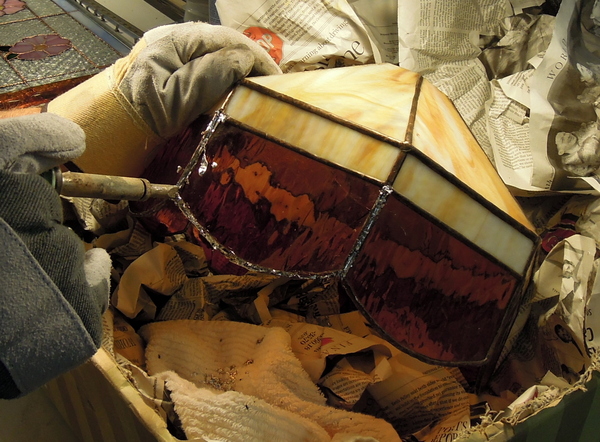
When we take out broken lamp pieces we use a large low sided box filled with crumpled newspaper for support of the lamp shade, then slowly and carefully remove the broken panel. What helps in this process is to take steel wool #0000 only to clean the old solder seams of their dirt and patina, as it allows faster melting of the old solder and less chance for heat build up to damage other pieces.

StainedGlassLampRemovalofBottomBrokenPieceJuly2014

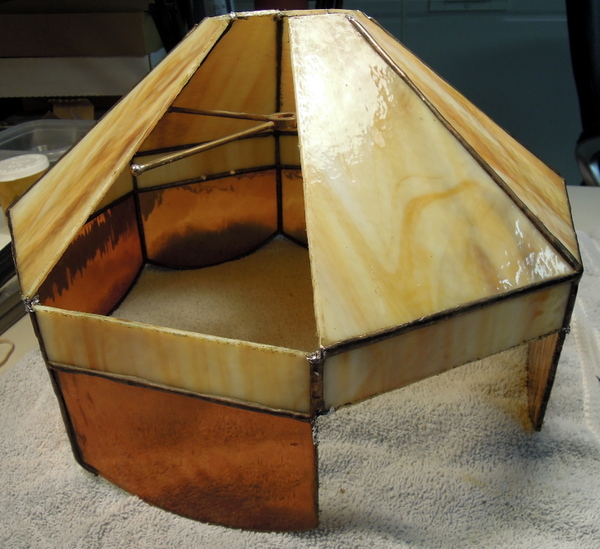
The next photo shows the lamp shade with all of the broken pieces and the crown removed. Then all of the edges need to be thoroughly cleaned and scraped of all of the old foil, using an X-acto knife, #0000 steel wool along with Kwik Clean. Then new foil has to be applied and burnished on to the existing cleaned areas and the new pieces to be used.

StainedGlassLampBrokenPiecesRemovedJuly2014

The next picture shows the crown fully restored.

StainedGlassLampRestoredCrownJuly2014

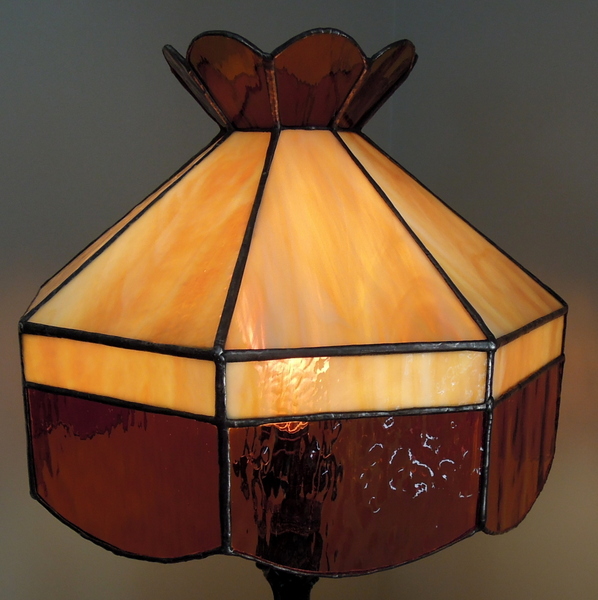
Once all the new pieces have been properly soldered in place, with beading as required along the edges. In this case we did our best to match the soldering techniques used by whoever made the lamp. Then the completed lamp shade is cleaned with Kwik Clean to remove flux. We then mixed some black and copper patina’s together to match the antique brass look. After that another cleaning with Kwik Clean, then Clarity stained glass polish applied, with final polishing using soft cloths and tooth brushes for the seams. Then double checking when on a lighted lamp stand which allows to see and find polish etc that we may have missed.

StainedGlassLampCompletionJuly2014

 Designer Unknown


Island Lake Update July 2014

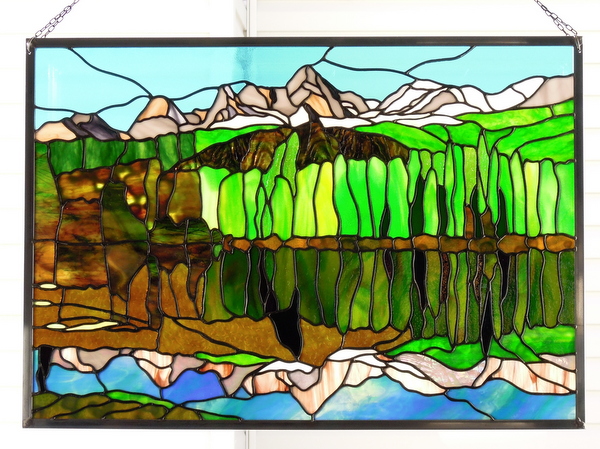
Island Lake is now completed and here it is in glorious sunshine. You can see the complete construction story with a quick search on our website. Enjoy

StainedGlassIslandLakeJanuary2015

Designed by Paned Expressions Studios

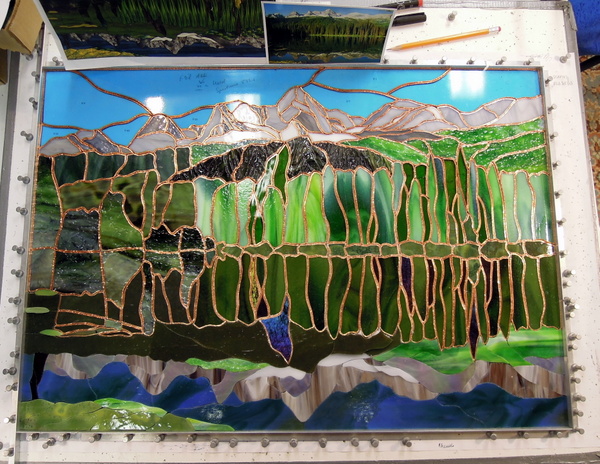
Island Lake panel now has all of it’s final pieces cut and rough ground. Now all that remains is for these pieces to be fitted then foiled and once that it done the panel will be ready for soldering

IslandLakeJuly2014

Tear Drop Heart

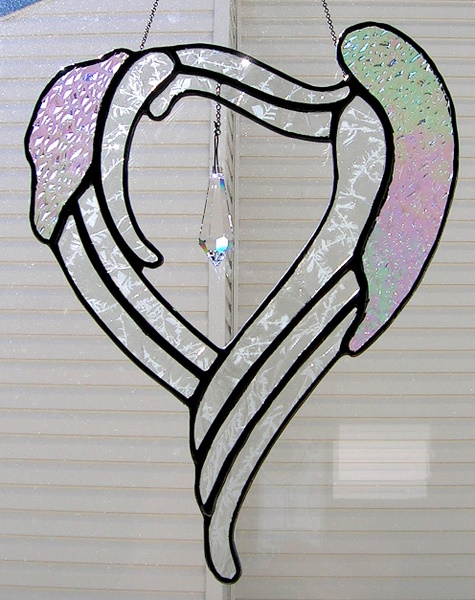
Over the years we have made these beautiful Tear Drop Hearts, which also has a hanging Swarovski Strass Crystal. We use Spectrum granite iridescent, along with frosted glass and they measure approximately 8 inches high x 7 inches wide, complete with a fine silver chain. When using clear glass we like to put black patina on the solder lines, but one must ensure to use black backed foil (7/32) to further enhance your piece, along with using Kwik Clean for cleaning and polish to make this wonderful suncatcher. These make wonderful gifts as they complement many decors.

TearDropHeart

We believe the original design was by Chris Rich

Alphabet Floral Letter “D”

The Daffodil flower is very pretty for the Alphabet Floral Letter “D”. In this instance we did not make a surrounding border and this piece measures approximately 6 x 6 inches. As with any of these Alphabet Letters one has to use the flower colors but one can then pick and choose the glass color and textures for the individual letters.

StainedGlassAlphabetLetterD

This alphabet floral letter D shown was surrounded by Glue Chip frosted glass, and this piece measures approximately 9.5 inches high x 8 inches wide, the silver hanging chain was soldered in to the seams.

StainedGlassFloraAlphabetLetterD

Design by Rachel Cecere

Simple Candle Holder

This is an easy to make simple designed candle holder. With a square base and 4 circles, which are relatively easy to attach together. We solder and bead the edges of the 5 pieces before assembling. You can use various clears and colored glass to suit your home decor. We buy the votive’s and candles from a local discount store and we also add 3/8 inch clear vinyl bumpers to the base to ensure that these and other candle holders we make do not scratch furniture.

SimpleCandleHolder

Design by Flory Wilkins